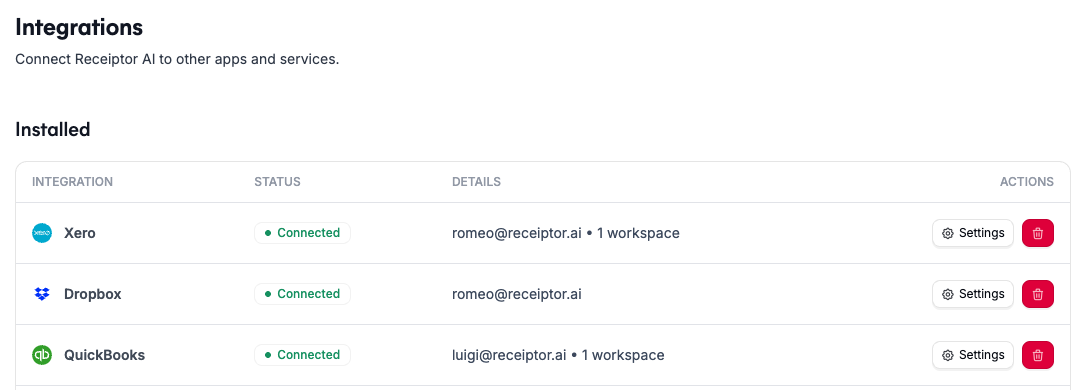
Navigate to Integrations in the left sidebar.
Find the Dropbox card and click Connect.
Authenticate with your Dropbox account and grant the requested permissions.
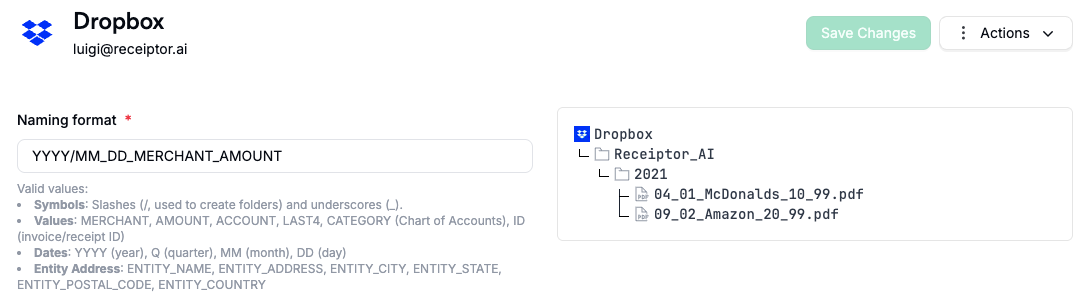
Receiptor AI will create a Receiptor_AI folder in your Dropbox. All exports to Dropbox will be stored inside this folder.

Once connected, you can define how documents are organized inside the Receiptor_AI folder. Click Settings in the Dropbox integration to set your preferred folder structure and file-naming format.
Use the same token system as ZIP exports. Use / to create folder levels and _ to separate parts of a filename.
Available tokens:
Document |
|
Date |
|
Entity address |
|
Example: YYYY/MM/MERCHANT_ID creates a year and month folder structure, with files named by merchant and document ID.
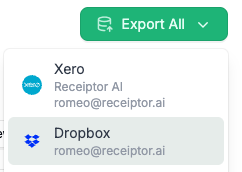
In the Documents section, select the documents you want to export.
Click Export All.
Choose Integration, then select Dropbox.
Click Export.
Use an Automation Rule to send documents to Dropbox as they are processed, without manual steps. Set the action to Store In and select your Dropbox connection.

Go to Integrations, find the Dropbox card, and click the three-dot button to access settings or remove the connection. Disconnecting does not delete any files already exported to your Dropbox.
Q: Where exactly are files stored in my Dropbox?
A: All files are stored inside a folder called Receiptor_AI at the root of your Dropbox. Your folder structure tokens determine the subfolder organization inside that folder.
Q: Can I connect more than one Dropbox account?
A: Yes.
Q: Will Receiptor AI access anything else in my Dropbox?
A: No. Receiptor AI only writes to the Receiptor_AI folder it creates. It does not read or modify any other files in your Dropbox.
Q: Can I change the folder structure after documents have already been exported?
A: Yes. Updating the structure affects only future exports. Previously exported files remain in their original locations.
Still have questions? Reach out via the in-app chat or at [email protected].
