Navigate to Email Accounts
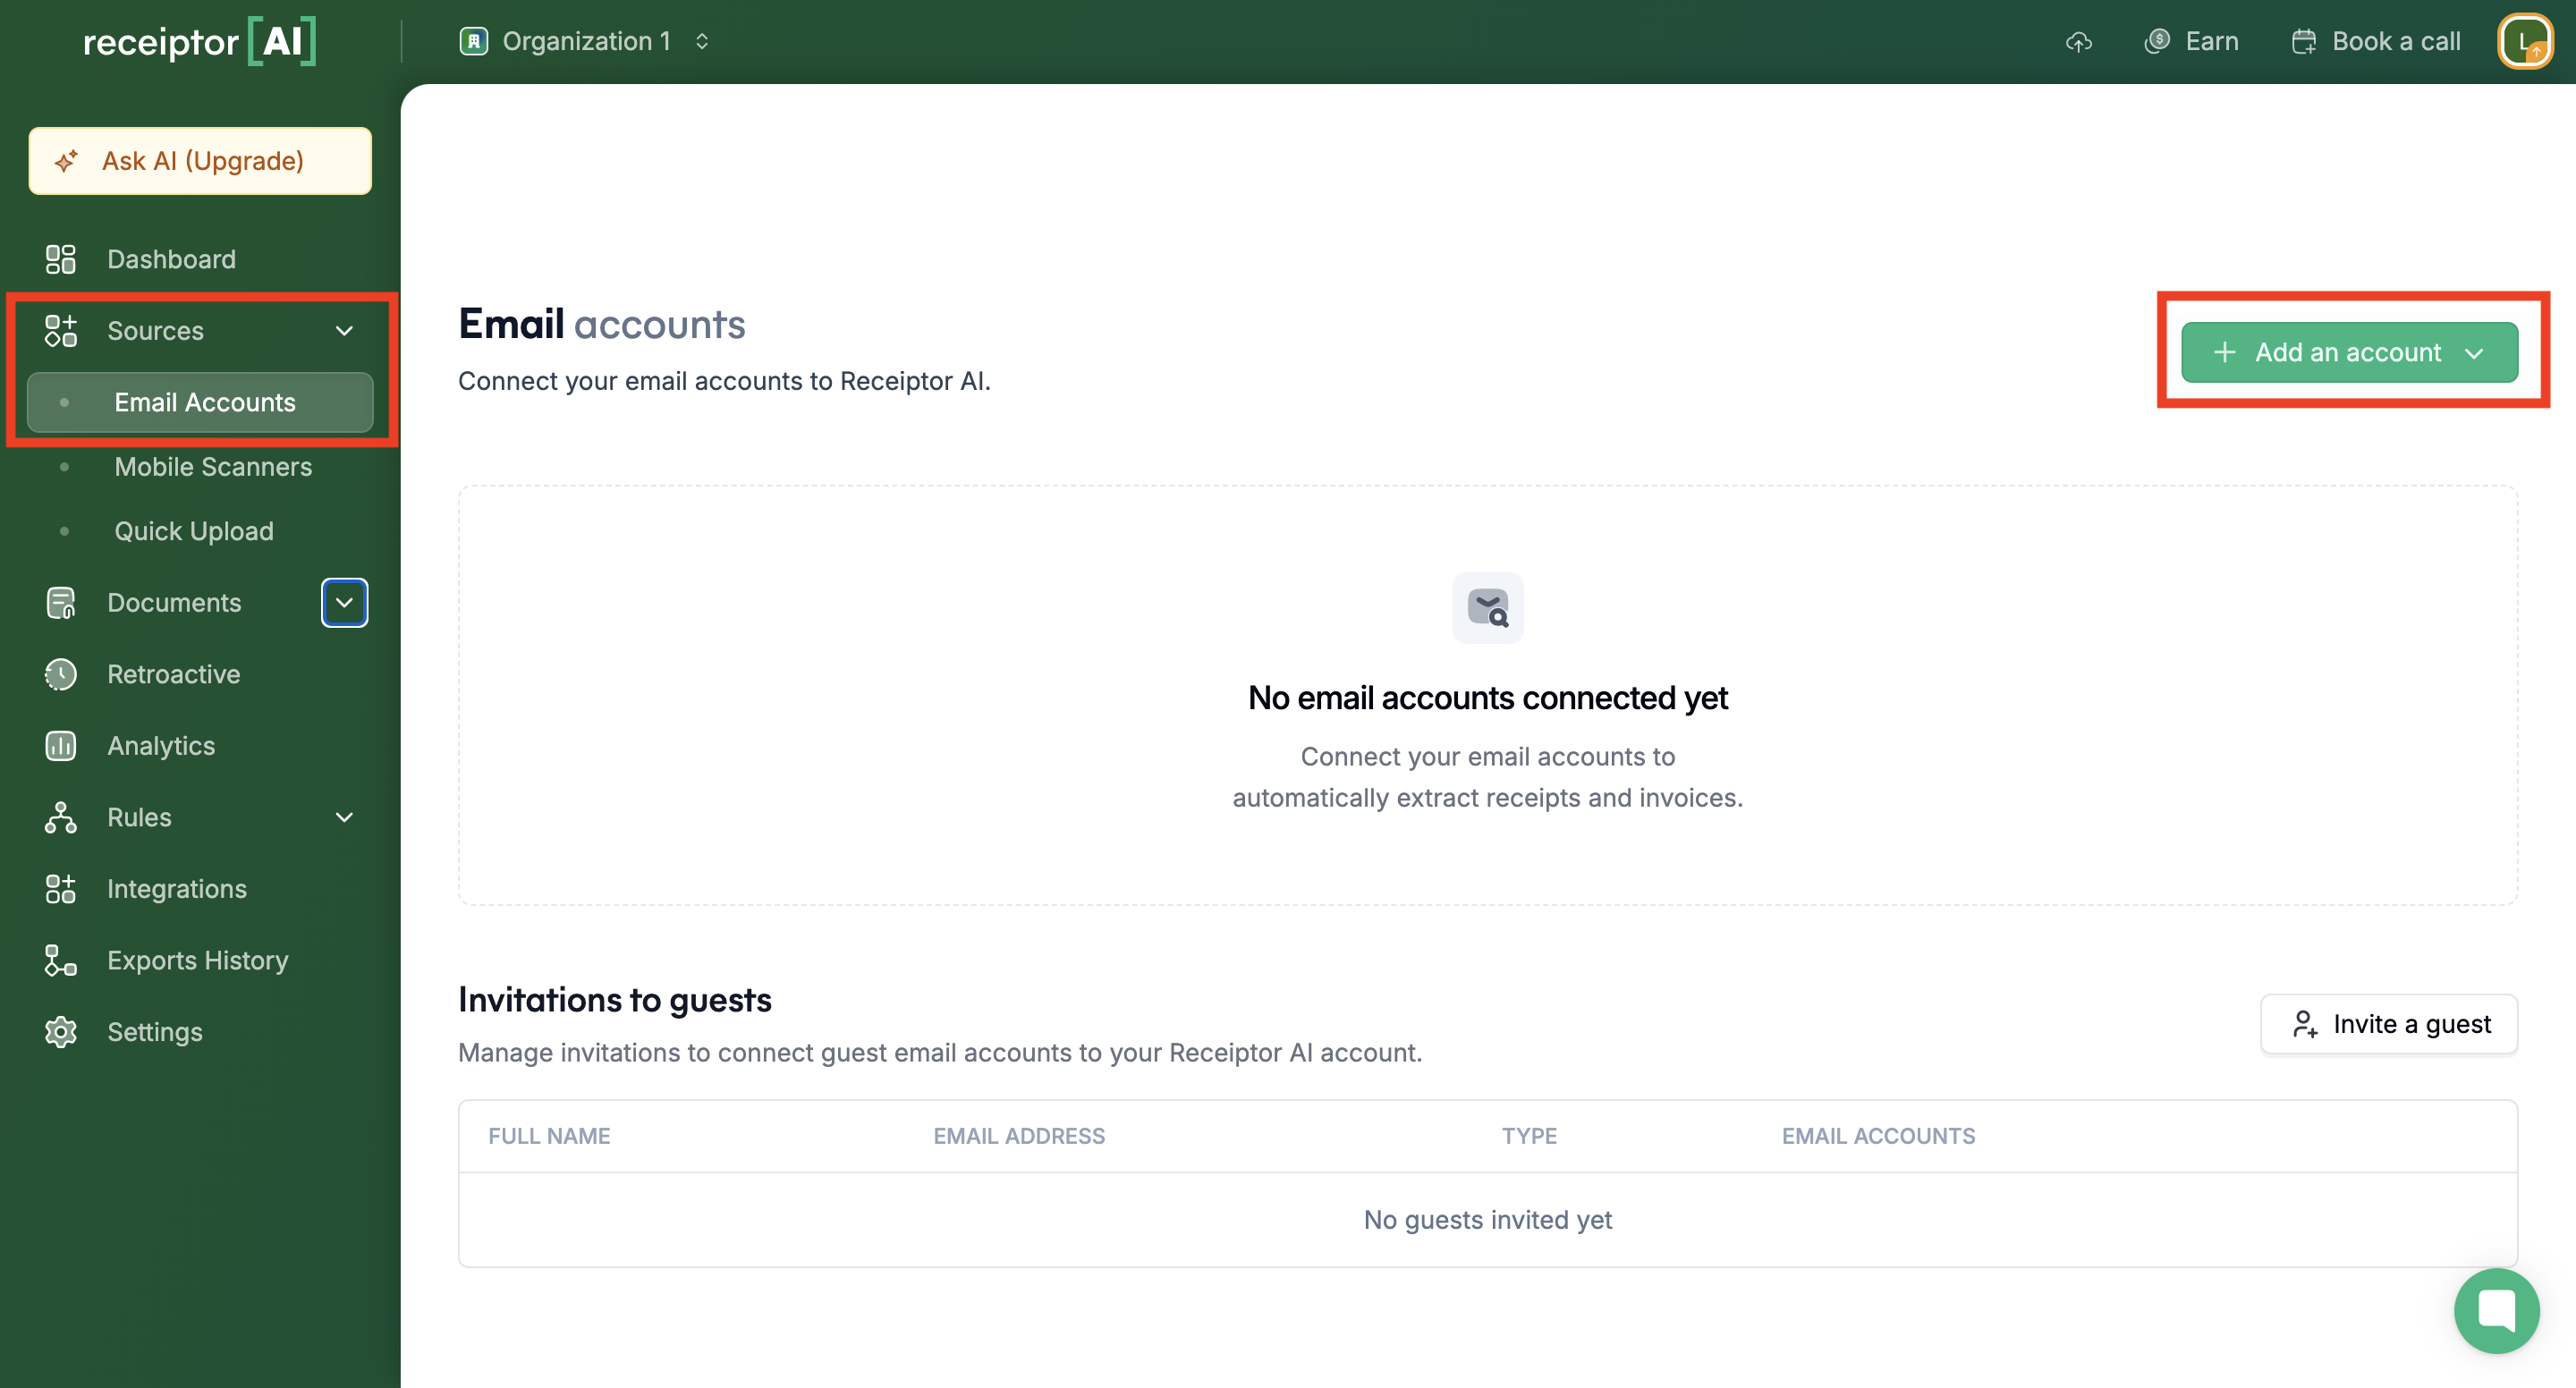
Go to the left sidebar
Click ‘Sources’ > ‘Email Accounts’
Click the ‘Add an account‘ button

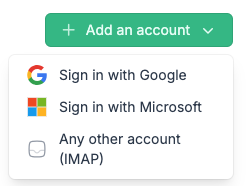
Choose your connection method (Google, Microsoft, IMAP)

You'll be redirected to your email provider's login page. Sign in and authorize Receiptor AI to access your inbox. Receiptor AI requires read-only access to scan receipts and invoices. We never send emails or modify your messages.
Return to your dashboard to confirm the connection was successful. You can now activate Continuous Monitoring or run a Retroactive Extraction.
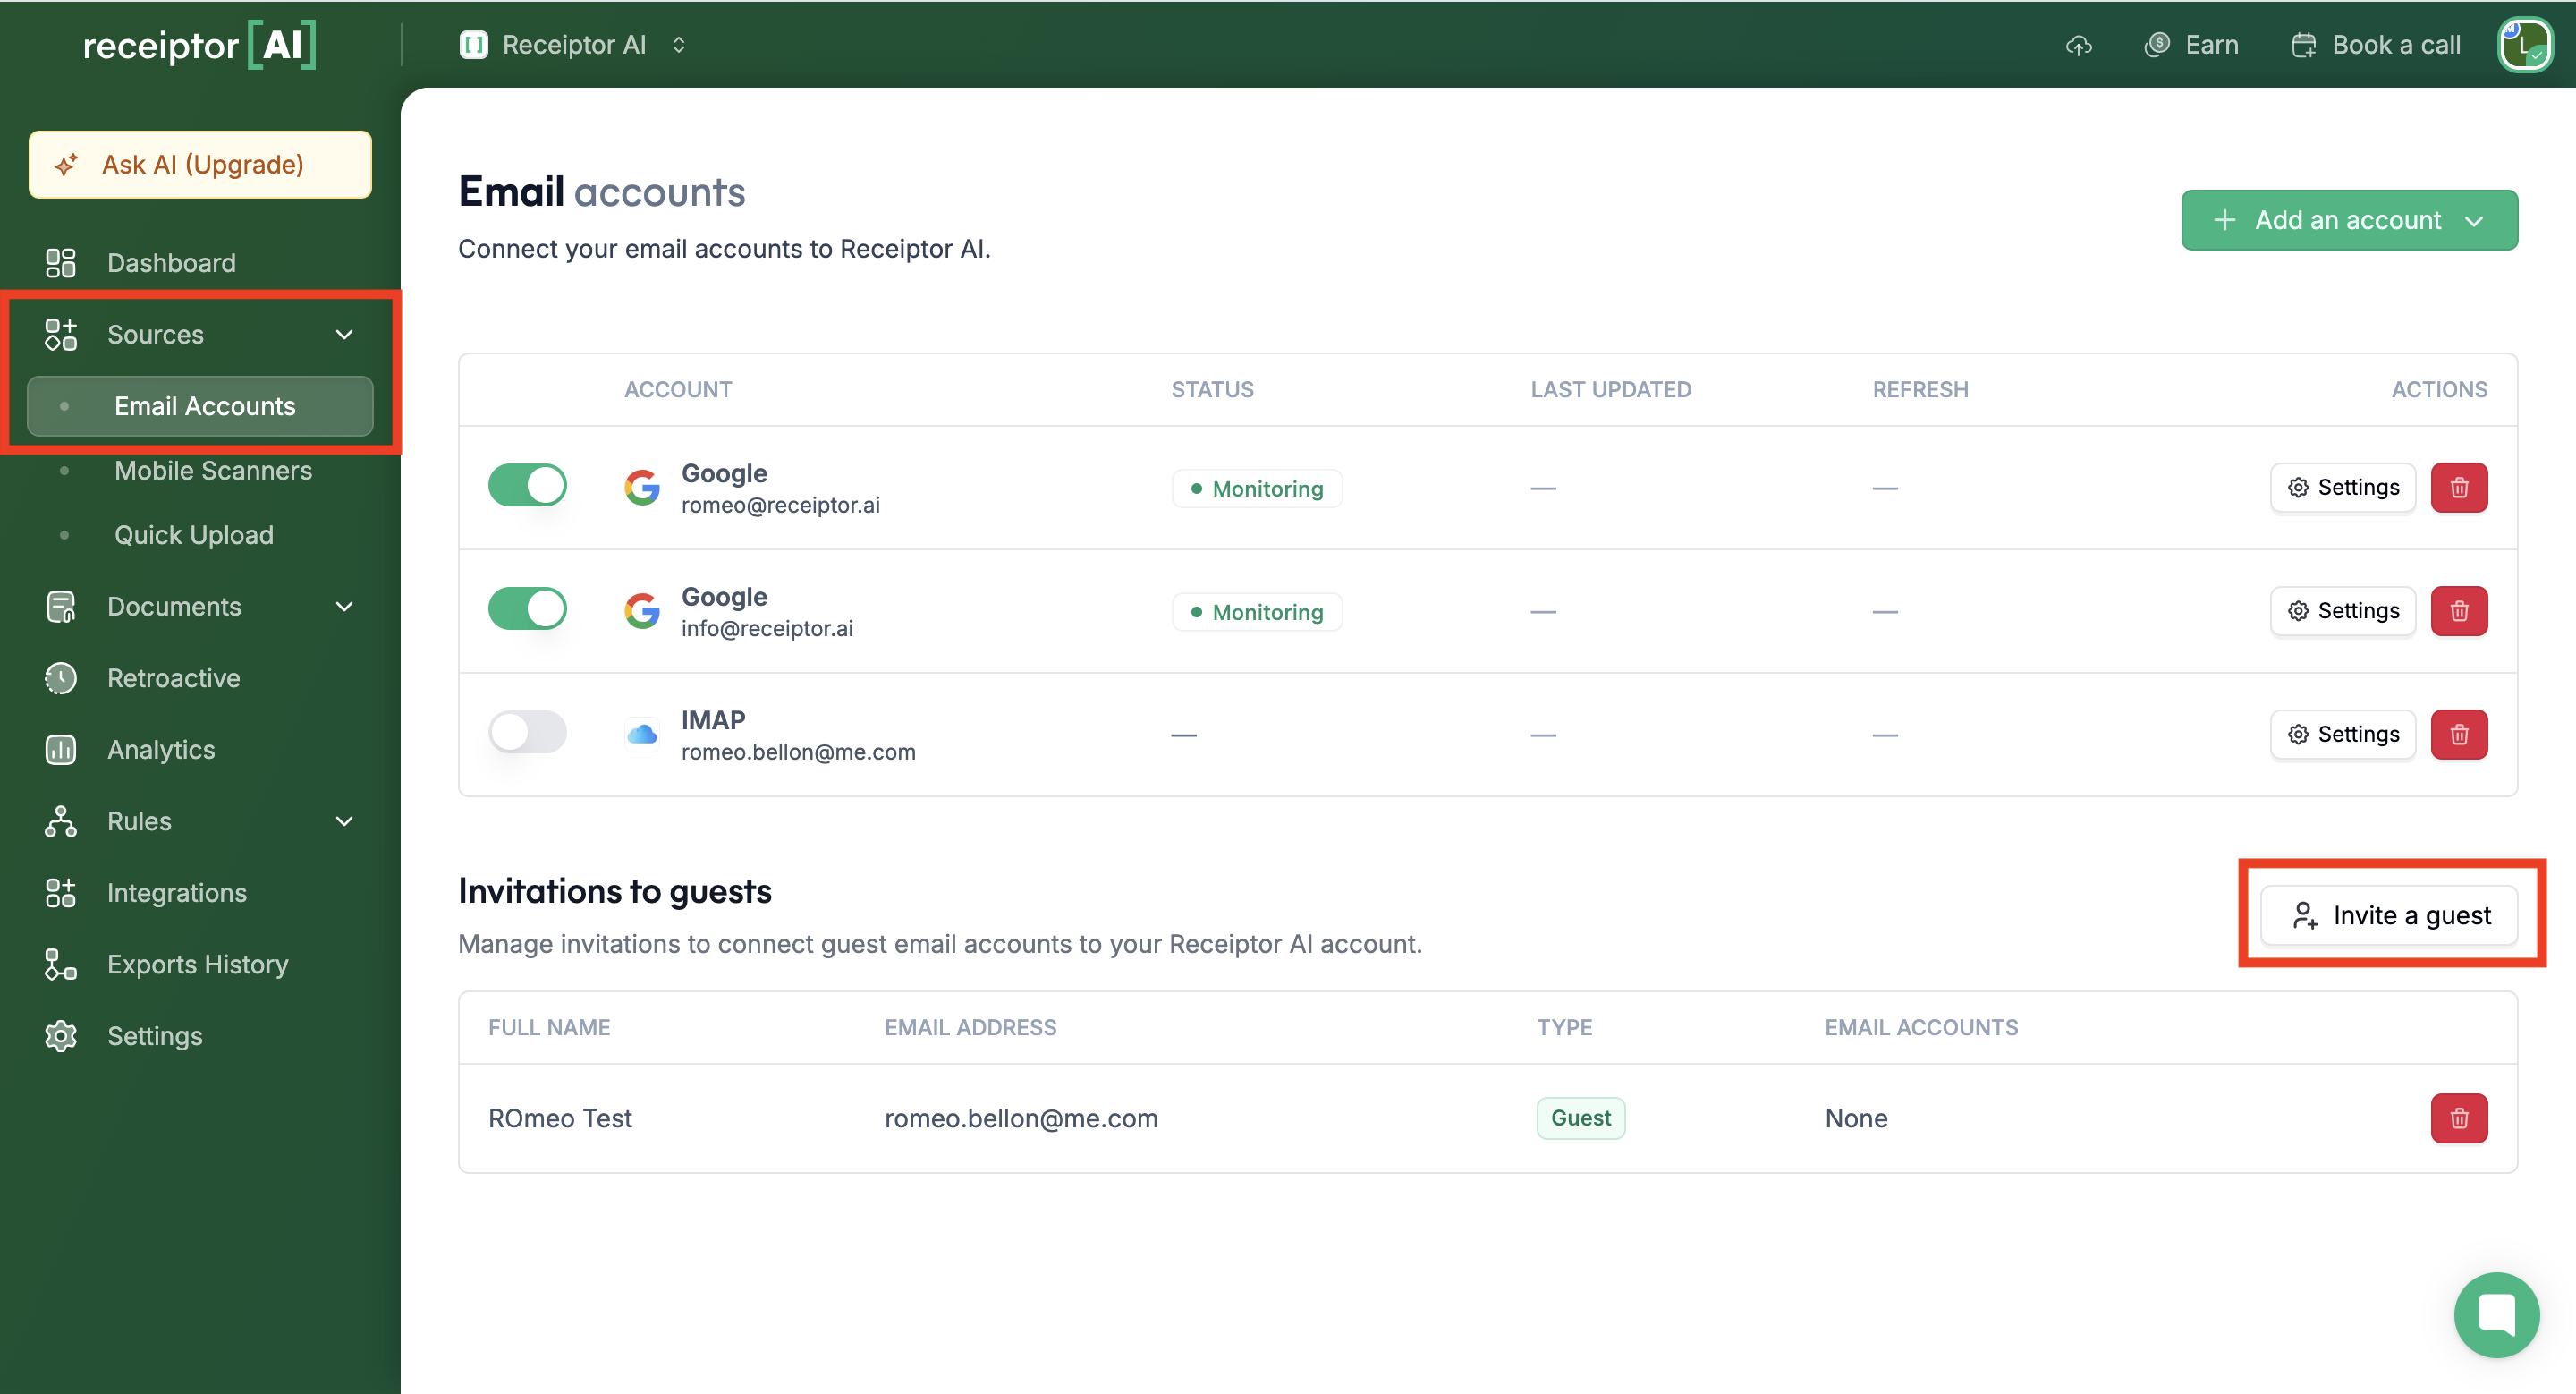
You can decide to add someone’s email inbox to your Organization by using the ‘Invite a Guest’ button. The guest’s email inbox will be connected, but they won’t need to create an account or have access to the Organization.
Navigate to the ‘Sources’ > ‘Email Accounts’ section.
Select the ‘Invite a guest’ option to begin the process.
Add your guest’s email address. He’ll receive an email asking him to grant Receiptor AI read-only access to his inbox.

If you need help to connect your email account, contact our support team at info@receiptor.ai or via live chat.