The Documents section displays all your processed documents, automatically extracted by Receiptor AI from connected sources such as email and mobile, or from manual uploads. From here, you can search, filter, label, edit, export, archive, or delete documents.
Navigate to ‘Documents’ > ‘Accounting’ from the left sidebar to see your extracted accounting documents.

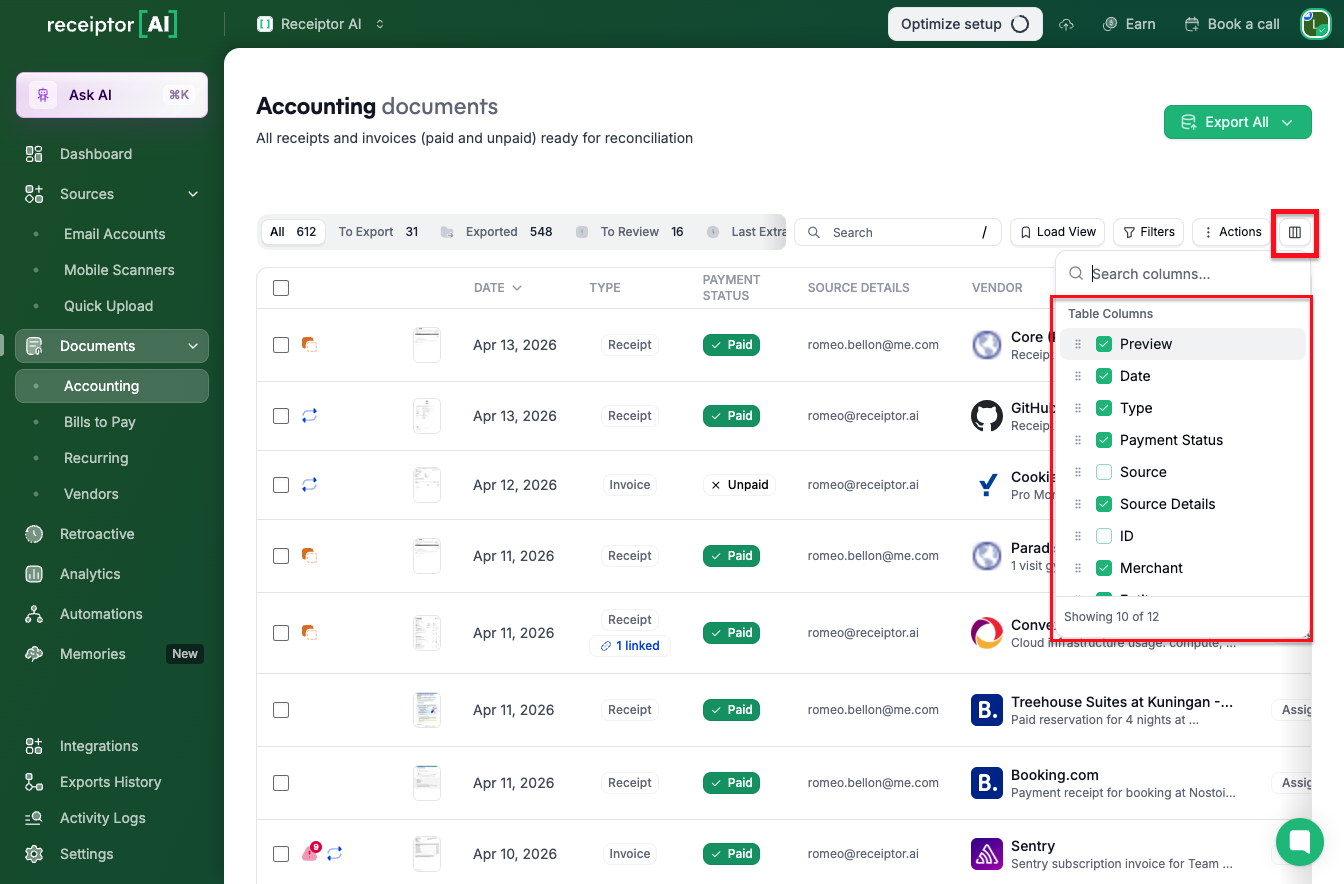
Receiptor AI displays all essential receipt and invoice data it has extracted or understood from your documents in a clear, customizable table format. It includes information about the document, its source, the merchant/vendor, and the financial transaction itself.
You can choose which columns to display using the Columns button at the top-right of the table.
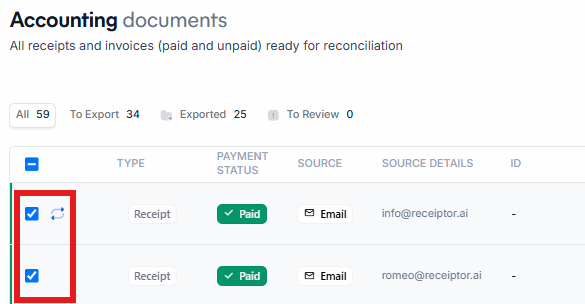
On the left side of each document row, you may see small icons that indicate what the AI has detected:

 Red alert: the document has been flagged as a potential anomaly and needs review.
 Recurring: the expense has been identified as recurring.
 Exported: the document has already been exported to at least one destination.
 Duplicate: the document has been matched as a duplicate of another.
 Automation: an automation rule has been triggered and applied to this document.
Hover over any icon to see more details.
Use the pre-built tabs at the top to navigate your documents by status:
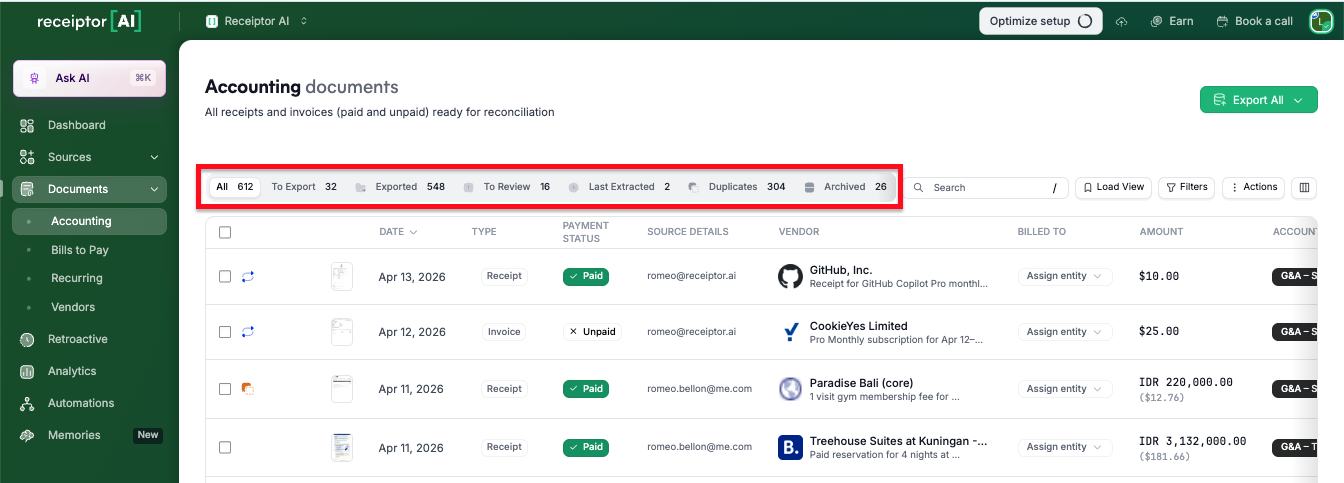
All: your complete document library.
To Export: documents that haven't been exported yet. Click the engine icon to filter by a specific destination that hasn't received the export.
Exported: documents that have already been exported. Click the engine icon to filter by a specific export destination.
To Review: documents flagged by the AI as potentially incorrect or incomplete.
Last Extracted: the most recently extracted documents.
Duplicates: all duplicate groups. Each group shows the master document and can be expanded to see all matches. Hover over a group to access: Choose Canonical (open a comparative view and pick the master document) or Keep suggested, archive the rest (clean up duplicates in one click).
Archived: all archived documents.
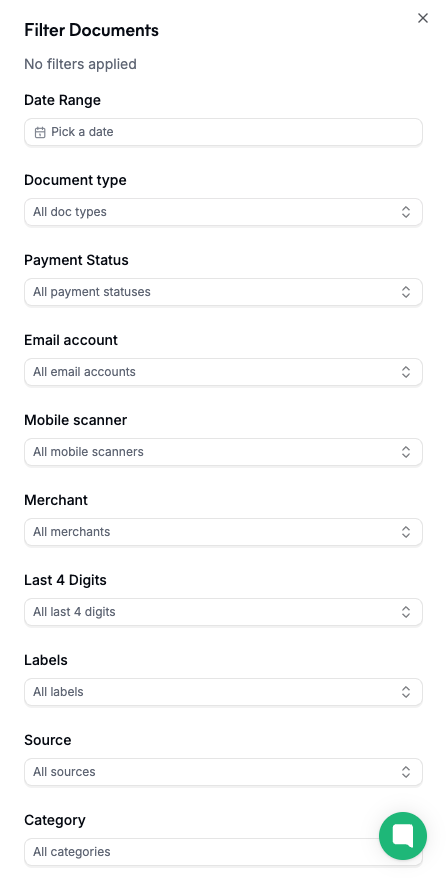
You can use filters and the search bar to review or export only certain documents.
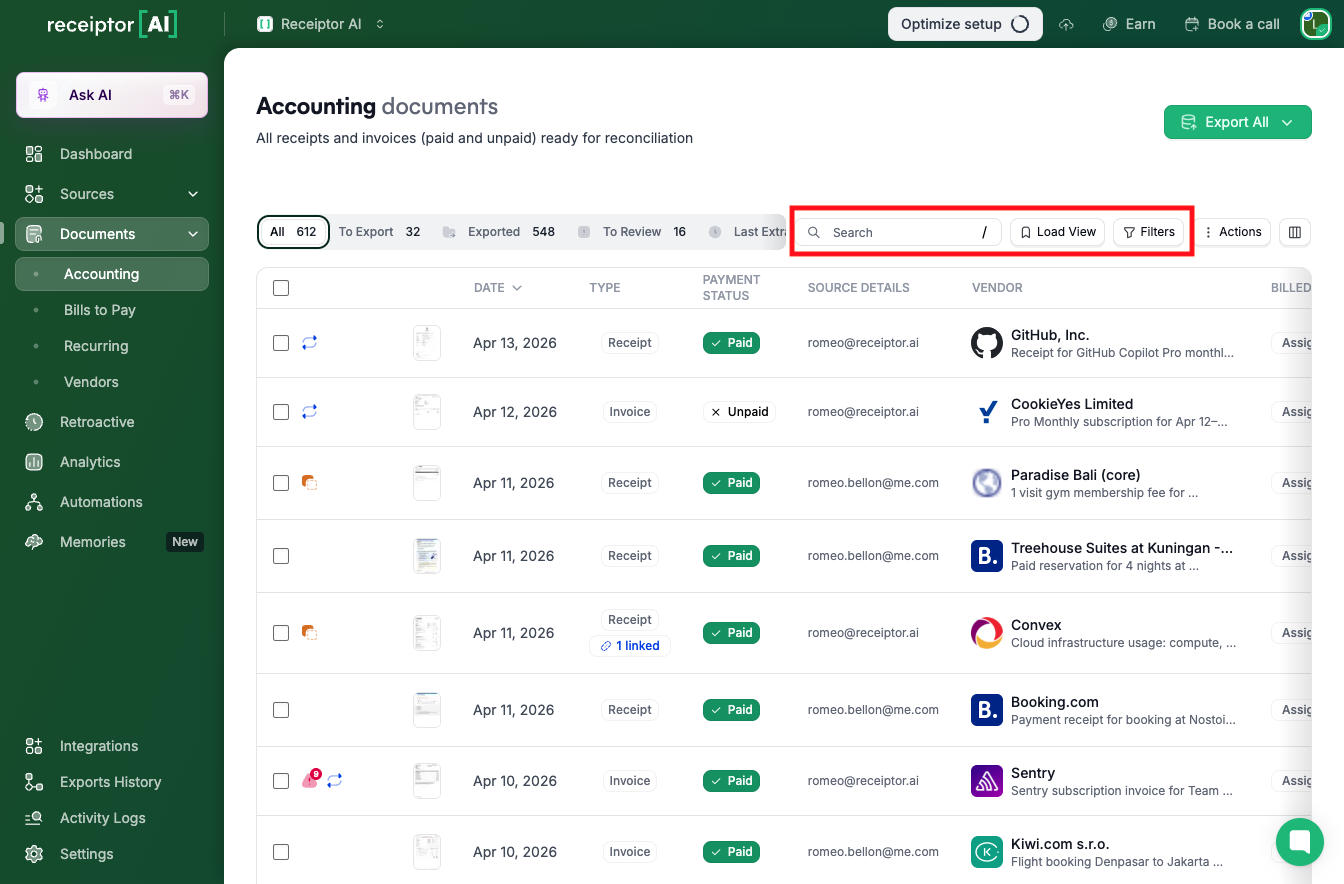
When applying filters, use the Save View button to save a specific view and load it again later from the Load View button.
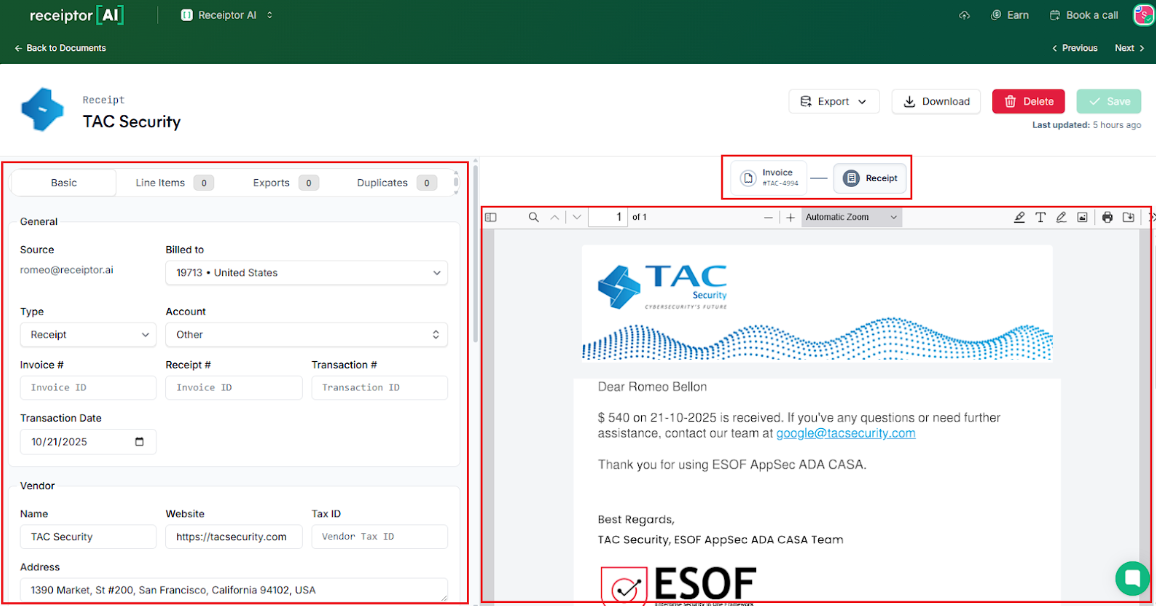
Click the Vendor Name in the list to open its detail view.
On the left: all extracted fields, editable. Line items are available in their own tab. The list of exports and identified duplicates is also shown here.
On the right: the PDF document. When matching receipts and invoices are found (e.g., a supplier invoice and its corresponding payment receipt), Receiptor links them for easier reconciliation and reporting.
At the top: Export, Download, Archive, and Save buttons, plus arrows to navigate to the previous or next document without going back to the table.
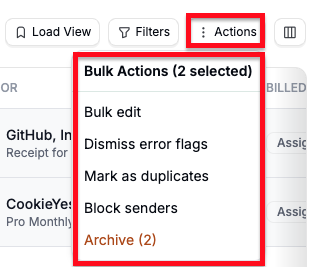
Use the checkboxes beside each document to select multiple entries.
Click Actions to choose from available options:
Bulk Edit: update categories, business entities, or destinations.
Bulk dismiss error flags: clear AI alert flags across selected documents.
Mark as duplicates: manually flag selected documents as duplicates.
Block Sender: prevent future imports from a specific email sender.
Bulk Archive: move selected documents to the archive.
Q: Can I select more than 20 documents at once?
A: Yes. You can select any number of documents using the multi-select feature. Hold Shift or use the Select All checkbox to select faster.
Q: What happens if I accidentally delete a document? Can I recover it?
A: If you've deleted a document, you can re-upload it manually, or our support team can help restore accidentally deleted items.
Q: I can't find documents I know were extracted.
A: Documents are tied to specific workspaces. Use the workspace switcher in the top-left corner to check that you're viewing the right workspace. If the document still doesn't appear, it may have been accidentally deleted. Check Activity Logs to see what happened to it.
Q: How do I categorize an expense?
A: Receiptor AI automatically categorizes expenses based on your Chart of Accounts, learning from your existing data and past entries. If something looks off, click the document to open its detail view, then use the Category dropdown to manually re-categorize it.
Q: Can I manually upload a document here?
A: Uploads are handled under Sources → Quick Upload, but you can also upload directly within the document view if you prefer to add a file on the spot.
For issues related to documents not appearing in this section, check the Activity Logs first to understand why the document may have been filtered out or failed processing, or contact info@receiptor.ai for additional assistance.
