A Business Entity is any legal entity (a company, sole proprietorship, branch, etc.) that can be billed on a document. In Receiptor AI, the Business Entity you define is what shows up in the Billed To field of every document.
The feature gives Receiptor AI a list of the entities you operate, so the AI can read the "Billed To" information on each document and automatically tag it with the right one. From there, you can filter, sort, export, and automate by entity.
Use this feature when documents for more than one legal entity arrive in the same inbox, mobile scanner, or upload flow. Typical use cases:
An entrepreneur running multiple companies (for example, a holding and one or more operating companies) where invoices for both land in the same email account.
A group with a parent company and subsidiaries that all receive supplier invoices in a centralized address.
Anyone running personal and business expenses through the same email and wanting to keep them separated.
An accountant or bookkeeper managing several client companies through a shared inbox.
If each entity has its own dedicated inbox, a cleaner alternative is to create a separate workspace per entity instead. Workspaces give you full separation of documents, sources, integrations, and settings, while Business Entities is the right tool when entities share the same inbox.
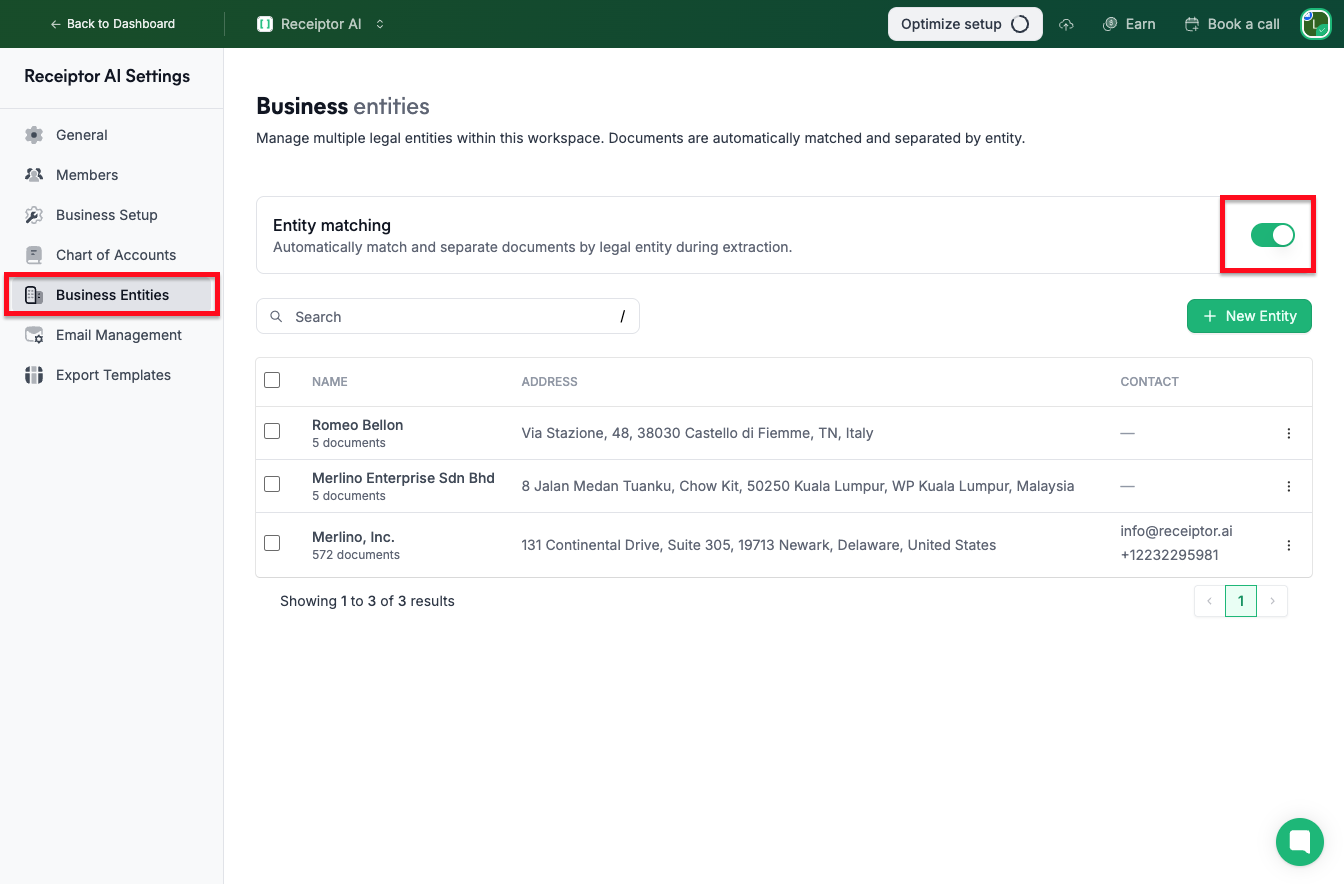
Navigate to Settings in the left sidebar.
Click Business Entities.
Toggle the feature on.
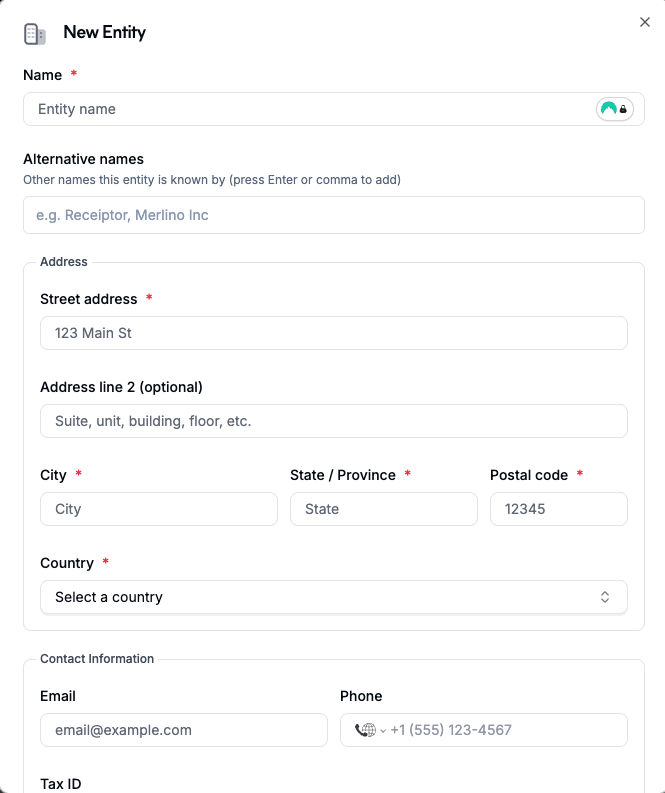
In Settings > Business Entities, click Create entity.
Enter the Entity Name. This is mandatory.
Optionally, add Aliases (alternative names the entity may appear as on documents). The more aliases you add, the more accurately the AI can match documents to this entity.
Enter the entity's Address. This is mandatory.
Optionally, add any of the following to improve matching accuracy:
Email address
Phone number
Tax ID (VAT number or equivalent)
Click Save.
Repeat for each entity you want to track.
From Settings > Business Entities, you can:
Edit an entity to update its name, aliases, address, or contact details.
Delete an entity if it is no longer needed.
Merge two entities if duplicates were created accidentally.
When a document is processed, Receiptor AI reads the "Billed To" information on the document and compares it against your entity list. The AI uses every field you've defined for each entity (entity name, aliases, address, email, phone, Tax ID) to find the best match. The more details you fill in, the more accurate the matching. If a match is found, the Billed To field in the document is automatically populated with the entity name.
You can always edit the Billed To field manually in the document detail view if the AI's match needs correcting.
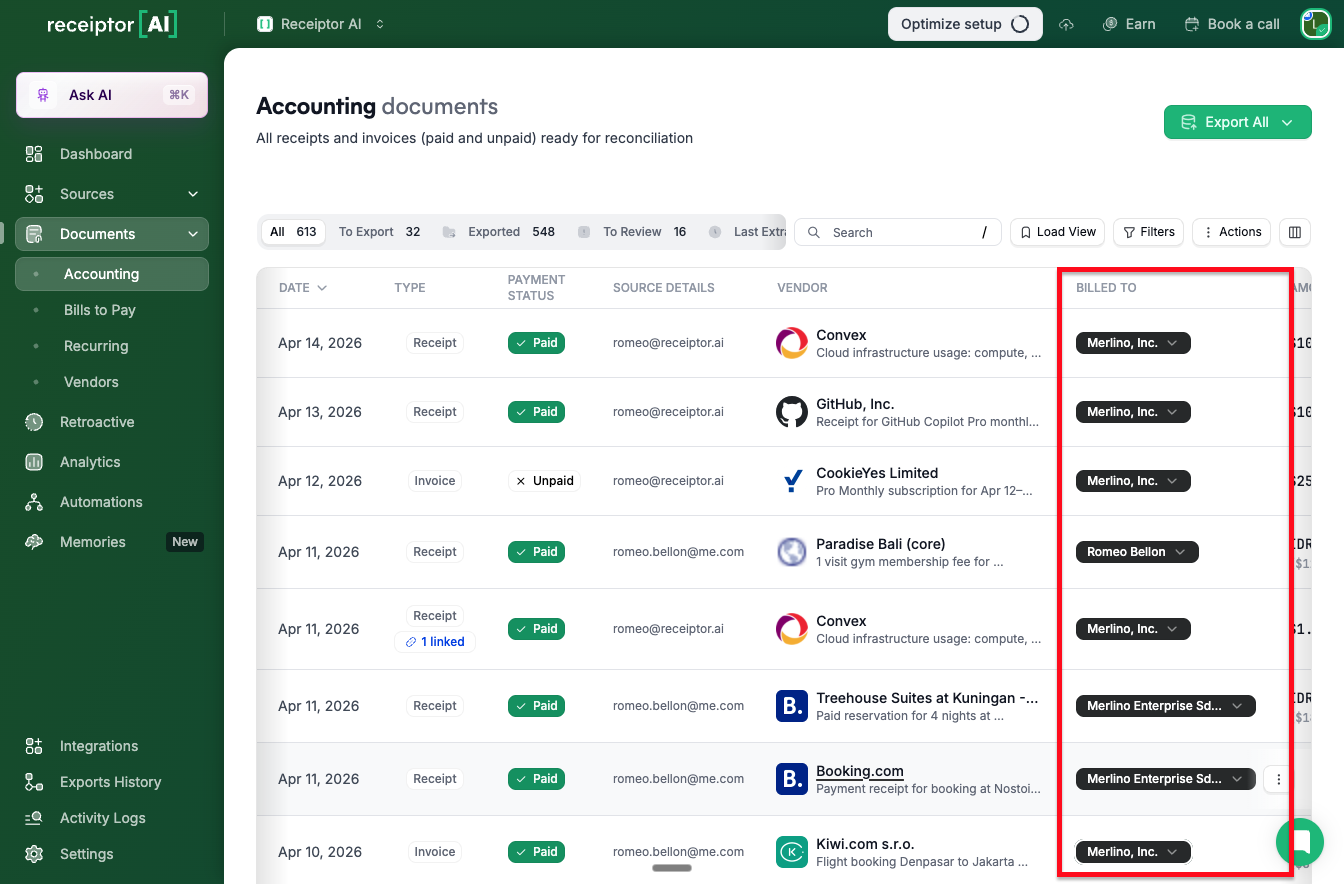
Once Business Entities is enabled, a Billed To column appears in the Documents section. If you don't see it, click the Column icon at the top of the table to show, hide, or reorder it. You can do this for any column, so put Billed To wherever you want it shown in your default view.
Once entities are set up, the Billed To field unlocks several workflows across Receiptor AI.
1. Filter documents and save views. Use the Filters panel in the Documents section to filter by Business Entity. Once applied, click Save View to create a persistent view scoped to that entity — useful for quickly reviewing all documents belonging to a specific company.
2. Automate routing by entity. Business Entity is available as a condition in your automation rules. This lets you route documents automatically based on which entity was billed — for example, sending all Company A invoices to one Xero account and all Company B invoices to another, without any manual intervention.
3. Organize ZIP exports and cloud storage by entity. When exporting as a ZIP or setting up a cloud storage destination (Google Drive or Dropbox), you can use entity tokens in the folder structure and file naming format: ENTITY_NAME, ENTITY_ADDRESS, ENTITY_CITY, ENTITY_STATE, ENTITY_POSTAL_CODE, and ENTITY_COUNTRY. This lets you automatically sort exported files into entity-named folders.
Q: Does enabling Business Entities affect my existing documents?
A: Existing documents already in your workspace will not be retroactively matched. Matching applies to documents processed after the feature is enabled. You can manually set the Billed To field, in bulk, on older documents if needed.
Q: What if a document cannot be matched to any entity?
A: The Billed To field will remain empty. You can open the document and assign it to an entity manually.
Q: Can I have the same entity in multiple workspaces?
A: Yes. Entities are workspace-specific, so you can define the same entity independently in each workspace where it is relevant.
Q: What is the difference between using Business Entities and creating separate workspaces?
A: Business Entities is the right choice when multiple entities share the same inbox. If each entity has its own dedicated inbox, separate workspaces give you a cleaner separation of documents, sources, integrations, and settings.
Q: Does matching also work on uploads from WhatsApp or Quick Upload?
A: Yes. Entity matching runs on every document Receiptor AI processes, regardless of source.
Still have questions? Reach out via the in-app chat or at [email protected].
