In some cases, you might want to get a CSV export, to turn your documents and data into a spreadsheet. This is how Receiptor AI does it for you.
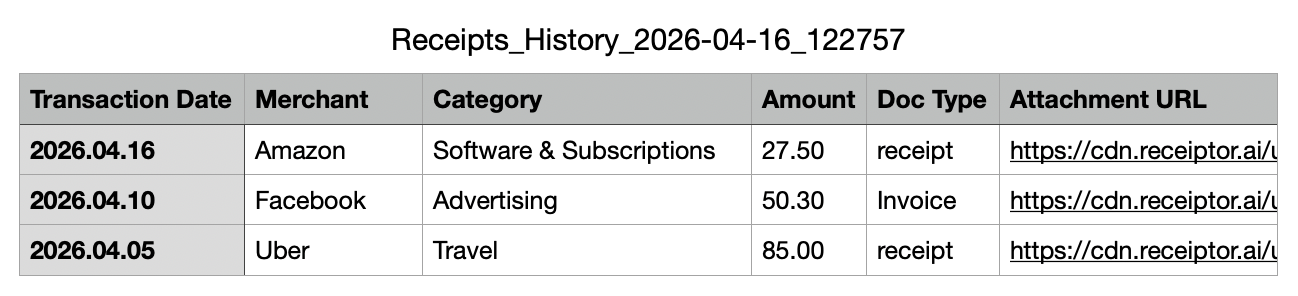
A CSV export produces a spreadsheet where each row is one document, and each column is a field from your chosen template: date, merchant, amount, category, payment status, and so on. Every row also includes a direct link to the original PDF, so you can open the source document straight from the spreadsheet.
If you enable Include Line Items, the layout changes: each line item on a document gets its own row, with the document-level fields (merchant, date, totals) repeated alongside the item-level detail.
In the Documents section
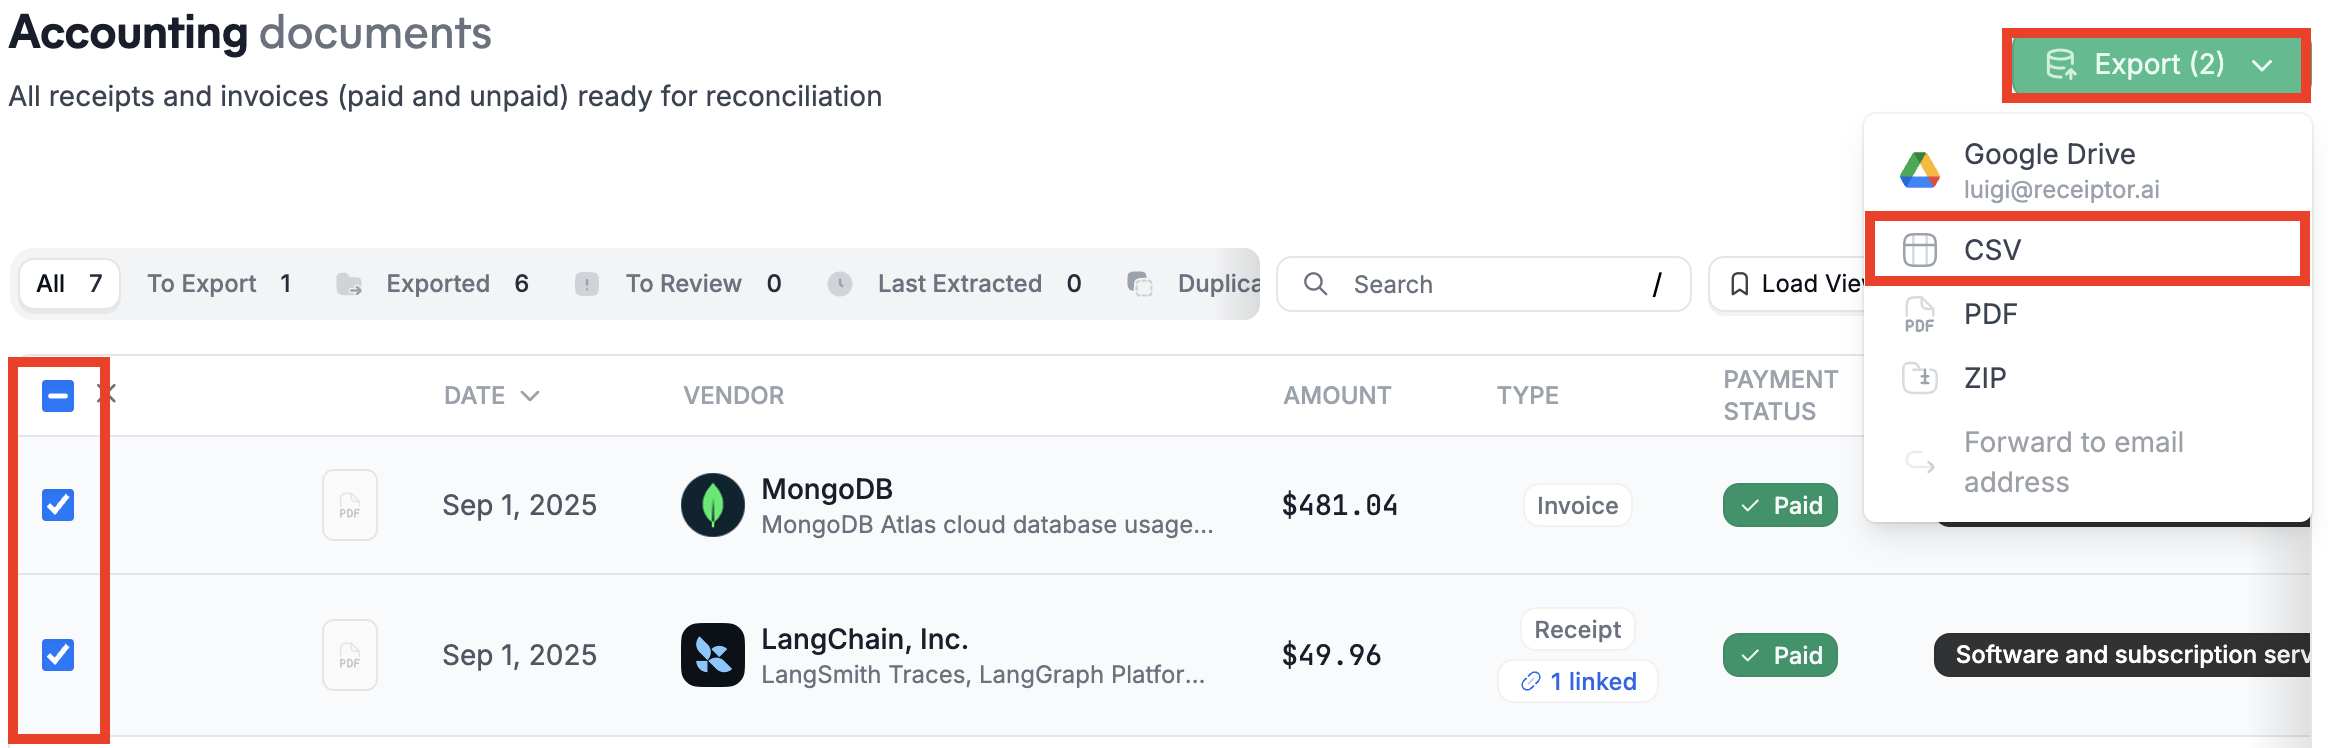
Select the documents you want to export using the checkboxes. Use the filters or tabs (e.g., To Export, Last Extracted) to narrow down your selection first if needed.
Click Export.
Choose CSV as the format.
Select the CSV template you want to use (see below).
Click Export to generate and download the file.
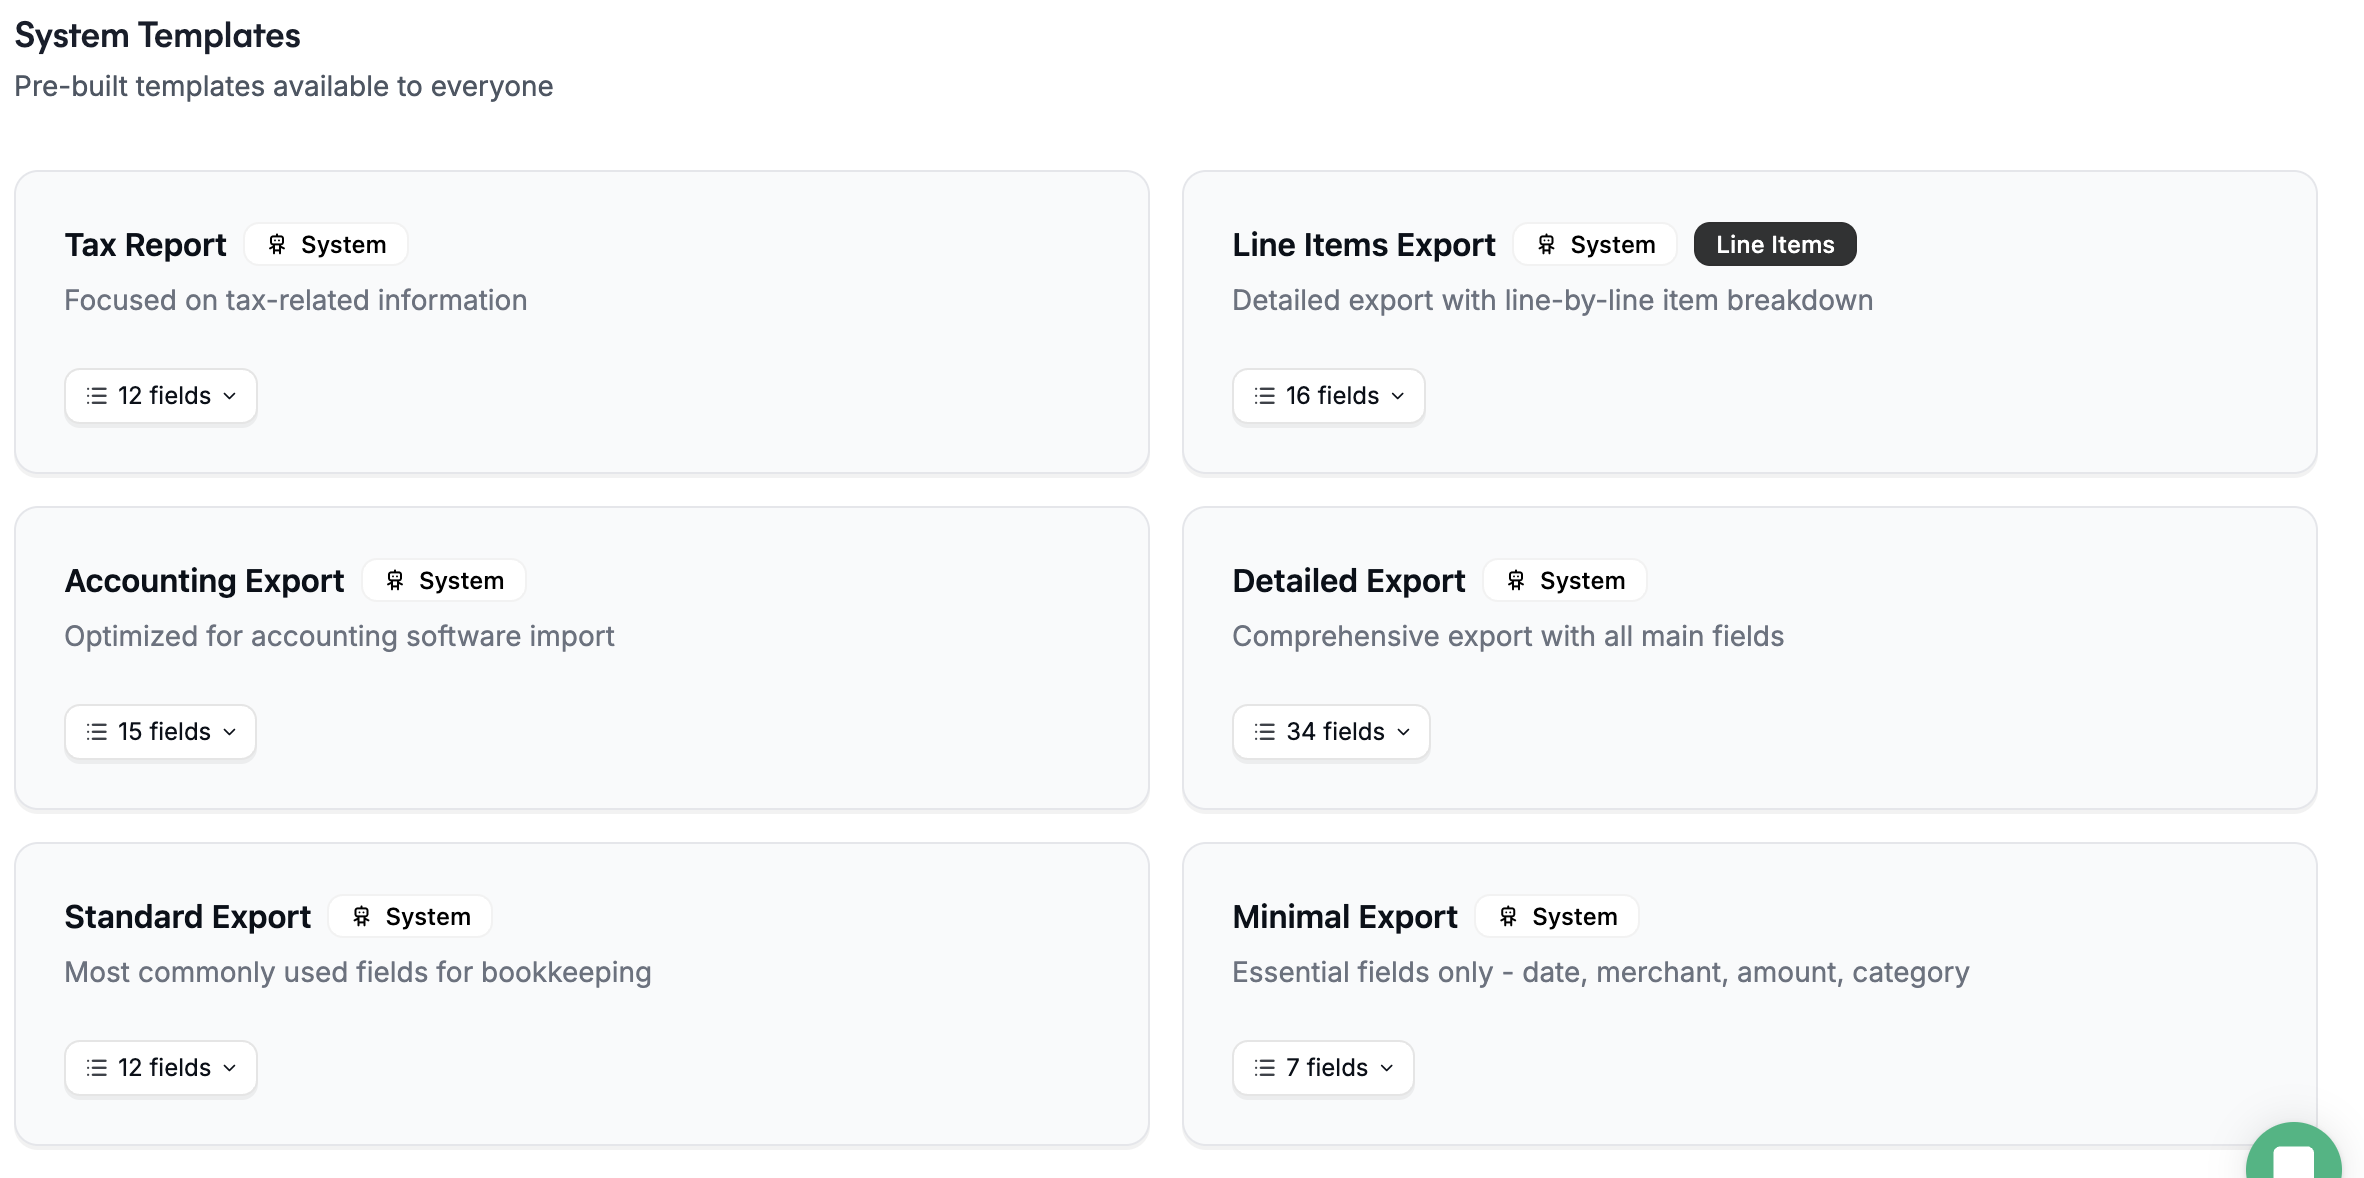
When you export as CSV, you choose which fields to include by picking a template. Receiptor AI comes with six pre-built templates:
Standard Export | General bookkeeping, the most commonly used fields |
Detailed Export | Comprehensive export with all main fields |
Accounting Export | Optimized for import into accounting software |
Tax Report | Focused on tax-related information |
Line Items Export | One row per line item instead of one row per document |
Minimal Export | Essential fields only: date, merchant, amount, category |
If none of the pre-built templates fit your workflow, you can create your own:
Navigate to Settings > Export Templates.
Click Create template.
Enter a Name and an optional description.
Select the fields you want to include. Fields are grouped by category:
Basic Information | Received At, Created At, Transaction Date, Transaction ID, Merchant, Amount, Amount Currency, Category, Doc Type |
Payment Details | Payment Method, Payment Method Ending, Payment Status, Amount Paid, Amount Due |
Tax Information | Tax Rate, Tax Type, Tax Amount, Subtotal |
Document Details | Invoice ID, Invoice Date, Receipt ID, Filename, From, To, Billing Period Start, Billing Period End, Dispute Deadline, Summary, Statement Description |
Merchant Information | Merchant Address, Merchant Tax ID, Merchant Website |
Currency Conversion | Total (Converted), Total Currency, Conversion Rate, Preferred Currency |
Other | Attachment URL |
Toggle Include Line Items on if you want one row per line item instead of one row per document.
Click Save.
Your template will appear in the template picker the next time you export as CSV.

You can schedule a CSV export to run automatically on any cadence (daily, weekly, monthly, or any custom interval) using a scheduled automation rule.
Go to Automations.
Click Create Automation.
In Basic Information, give the rule a name (e.g., "Weekly CSV export to accountant").
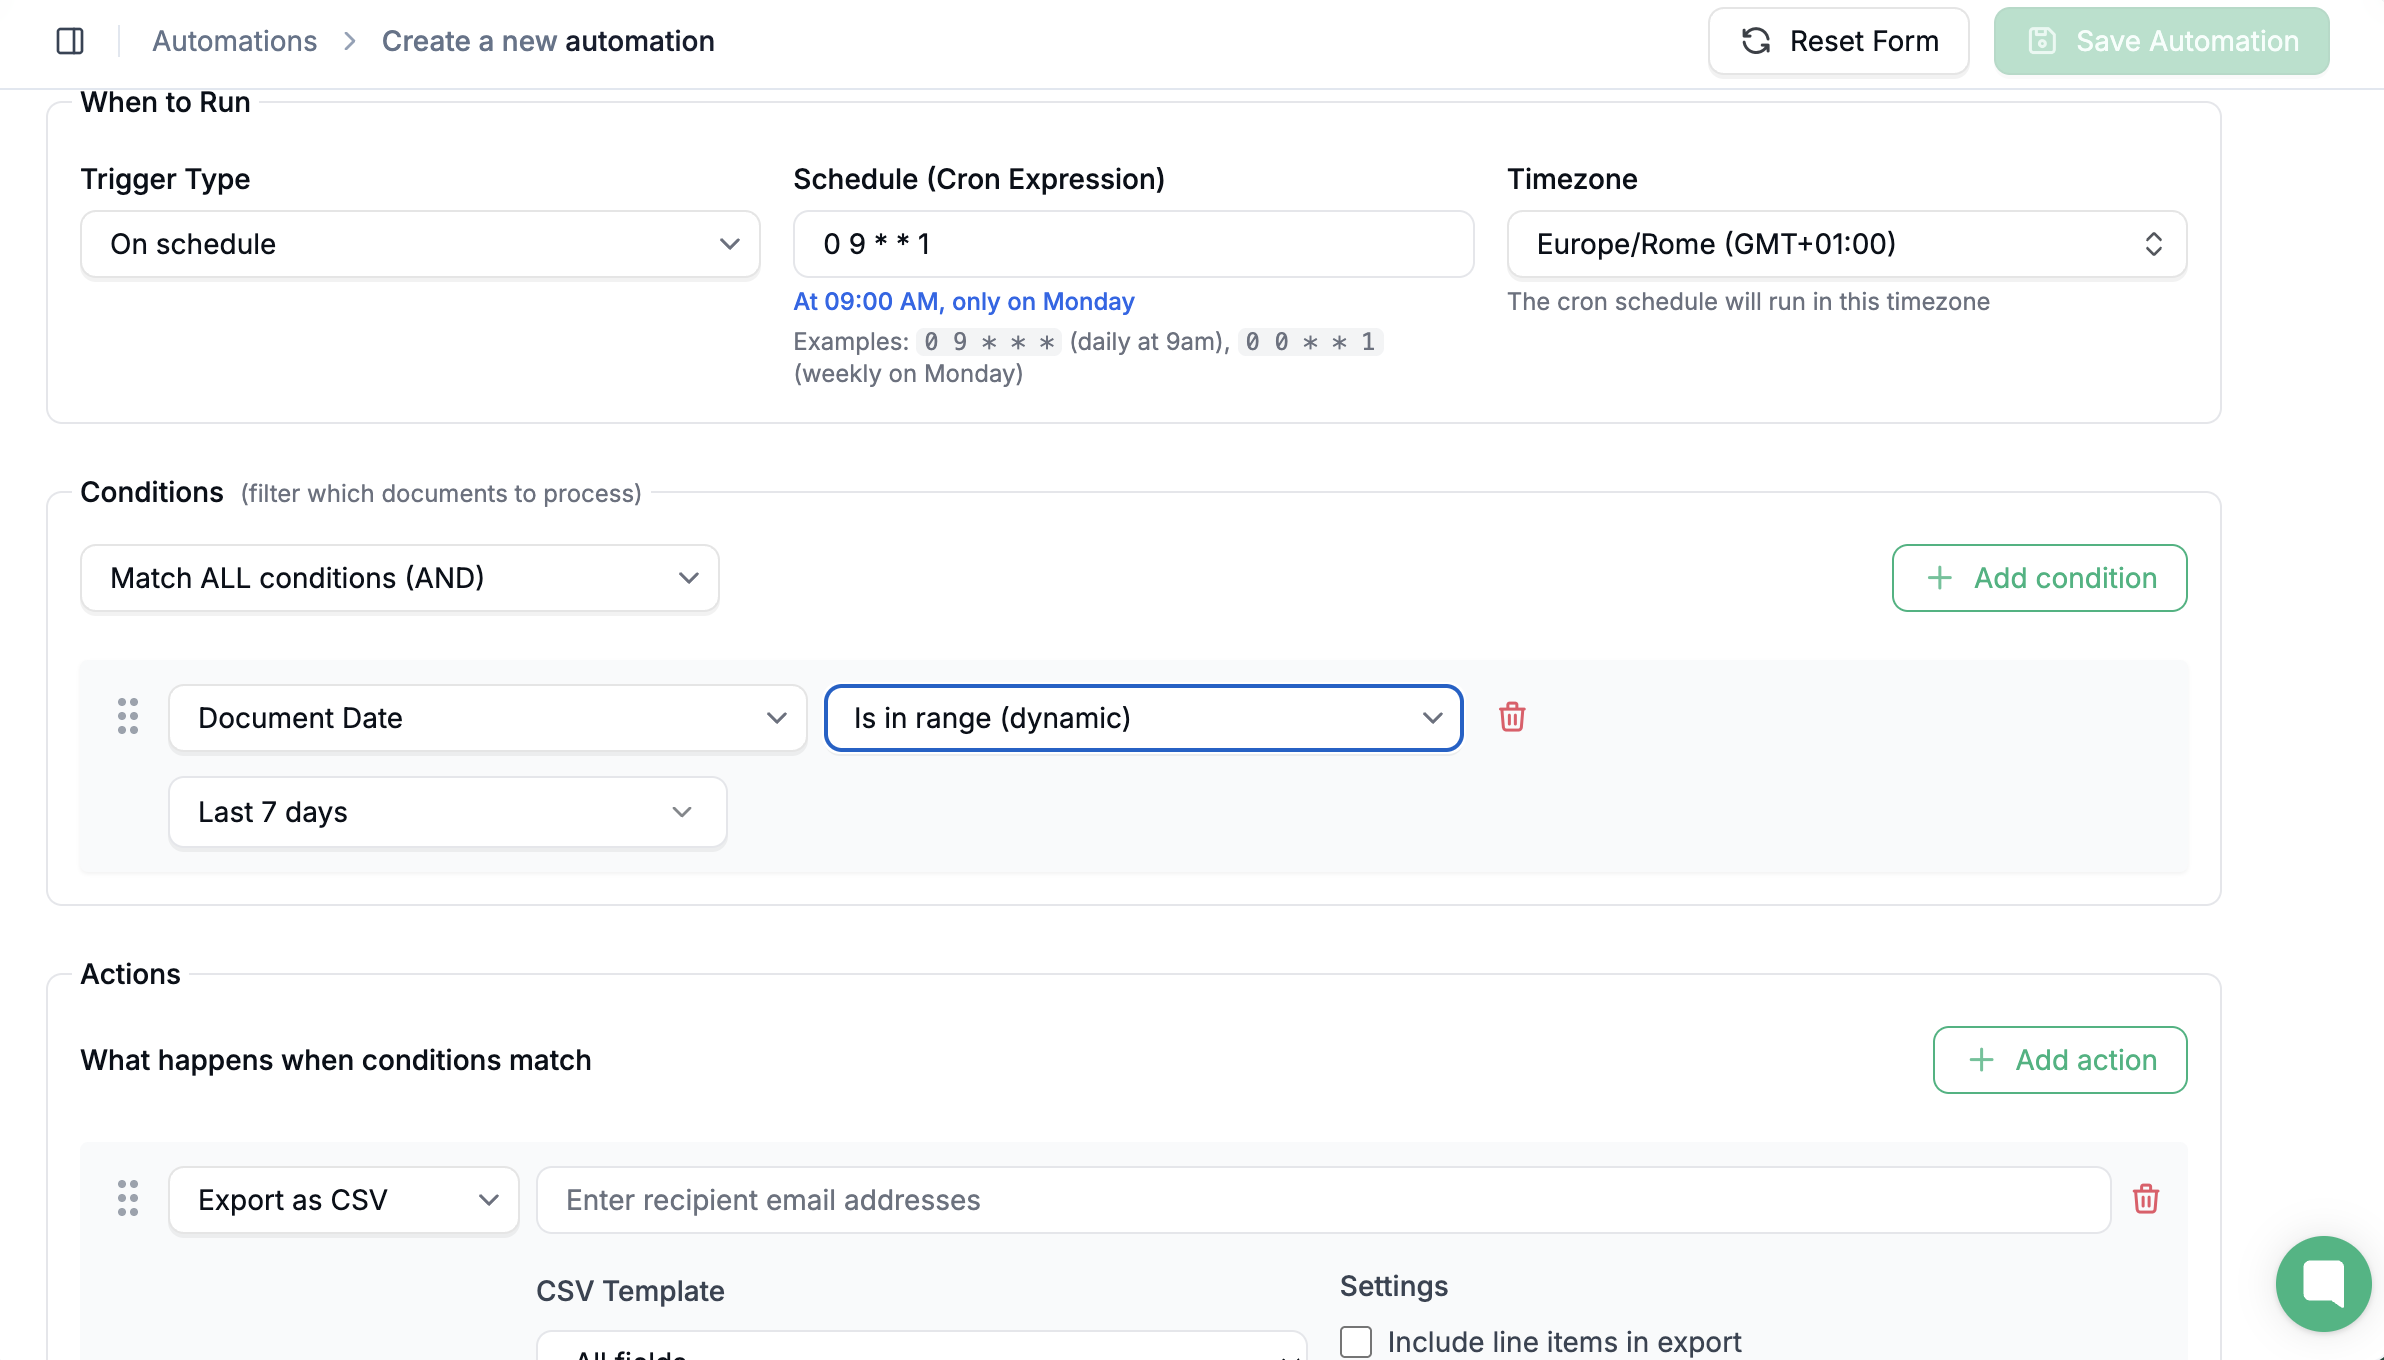
Set the Trigger to On Schedule and enter your cron expression and timezone. For example, every Monday at 8am is 0 8 * * 1.
Add Conditions if you want to filter which documents are included. For example, you can limit the export to a specific document type, a date range, a merchant, or a payment status.
In Actions, add Export as CSV and select the template to use.
Save the rule.
From this point, Receiptor AI will automatically export the matching documents as a CSV on your chosen schedule.
Q: What is the difference between "one row per document" and "one row per line item"?
A: By default, each document produces one row in the CSV with a summary of all its fields. If you enable Include Line Items, each individual line item on a document gets its own row, with the document-level fields repeated. Use the Line Items Export template or enable this toggle on a custom template when you need itemized data.
Q: Can I use a custom template for automated scheduled exports?
A: Yes. When setting up an automation with a scheduled CSV export action, you can select any of your saved custom templates.
Q: My export failed. What should I do?
A: Go to Exports in the left sidebar and check the status of the job. If it shows as failed, click the three-dot menu to Copy Job ID and share it with support via live chat or at [email protected].
Q: The Amount field shows a different currency than expected. Why?
A: The Amount field reflects the original document currency. To get amounts converted to your workspace's preferred currency, include the Total (Converted) and Preferred Currency fields from the Currency Conversion group.
Still have questions? Reach out via the in-app chat or at [email protected].
