
Overview
Auto-storage helps you stay audit-ready without lifting a finger. Every processed document is securely saved to your Drive in real time, no more digging through emails or downloads.
Step 1: Connect Google Drive
Go to ‘Integrations’
Click ‘Connect’ next to Google Drive
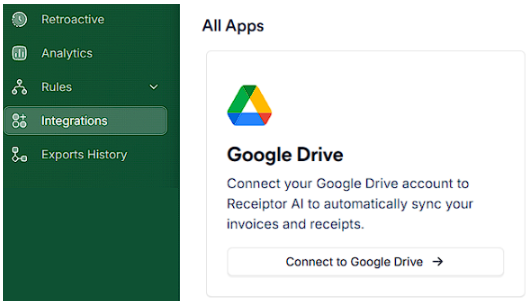
Sign in with your Google account and authorize Receiptor AI. You’ll be redirected back with a confirmation message. Make sure to set up your Google Drive structure properly.
Step 2: Set Up Auto-Storage
Go to ‘Rules’ > ‘All Rules’ > ‘Create Rule’
Follow the steps on how to create automations:
Trigger: select ‘When document is created’
Conditions: choose None (leave blank), or you can also add conditions if necessary, for example:
File Type: PDF vs. Image
Document Type: Receipt vs. Invoice
Merchant: Uber, AWS, Amazon, etc.
Action: select ‘Store In’ → Google Drive
Name and Save the Rule
Common Questions
Q: Can I control the file names or structure?
A: Yes. Go to Integrations > Google Drive Settings > Naming format
Q: How do I share those exported documents with someone?
A: Just share the Receiptor folder in Google Drive. No need to forward anything manually.
Support
Ping us via chat in the dashboard or email [email protected] if you need assistance.