If you need to share your financial documents, auto-forwarding ensures they always land in the right inbox without you having to lift a finger. Stay hands-off while staying in sync.
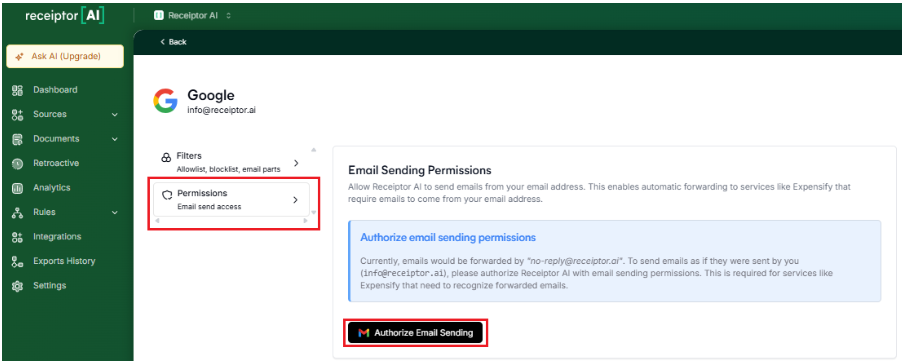
Make sure you have connected the inbox to Receiptor AI: ‘Sources’ > ‘Email Accounts’. Then go to ‘Settings’.

Click ‘Permissions’, then ‘Authorize Email Sending’

Go to ‘Rules’ > ‘All Rules’ > ‘Create Rule’
Follow the steps on how to create automations:
Trigger: select When document is created
Conditions: choose to add conditions, for example:
From email: Equals to vs. Contains > Enter from email
Document Type: Receipt vs. Invoice
Merchant: Uber, AWS, Amazon, etc.
Action: ‘Forward to Email’ → Enter email address (Enter to add multiple email addresses)
Name and save the Rule
Q: Can I forward to multiple people at once?
A: Yes. You can add as many recipients as you like.
Q: Can I forward only documents from a specific client or tag?
A: Yes. Use the Conditions in the Auto-Forward settings to route documents based on different fields (merchant name, payment status, etc.)
Q: Will the recipient have access to my Receiptor account?
A: No. They only receive the forwarded files. They cannot log in, view your inbox, or change settings.
Q: Can I send documents to tools like Dext or Expensify via email?
A: Yes! Just use the platform’s official import email address (e.g. receipts@expensify.com) as your recipient.
Chat with us anytime inside your dashboard or email info@receiptor.ai. We're happy to assist.