Among all Receiptor AI agentic skills, you’ll be able to sync all the extracted documents with your QuickBooks bank feed. Here is how:
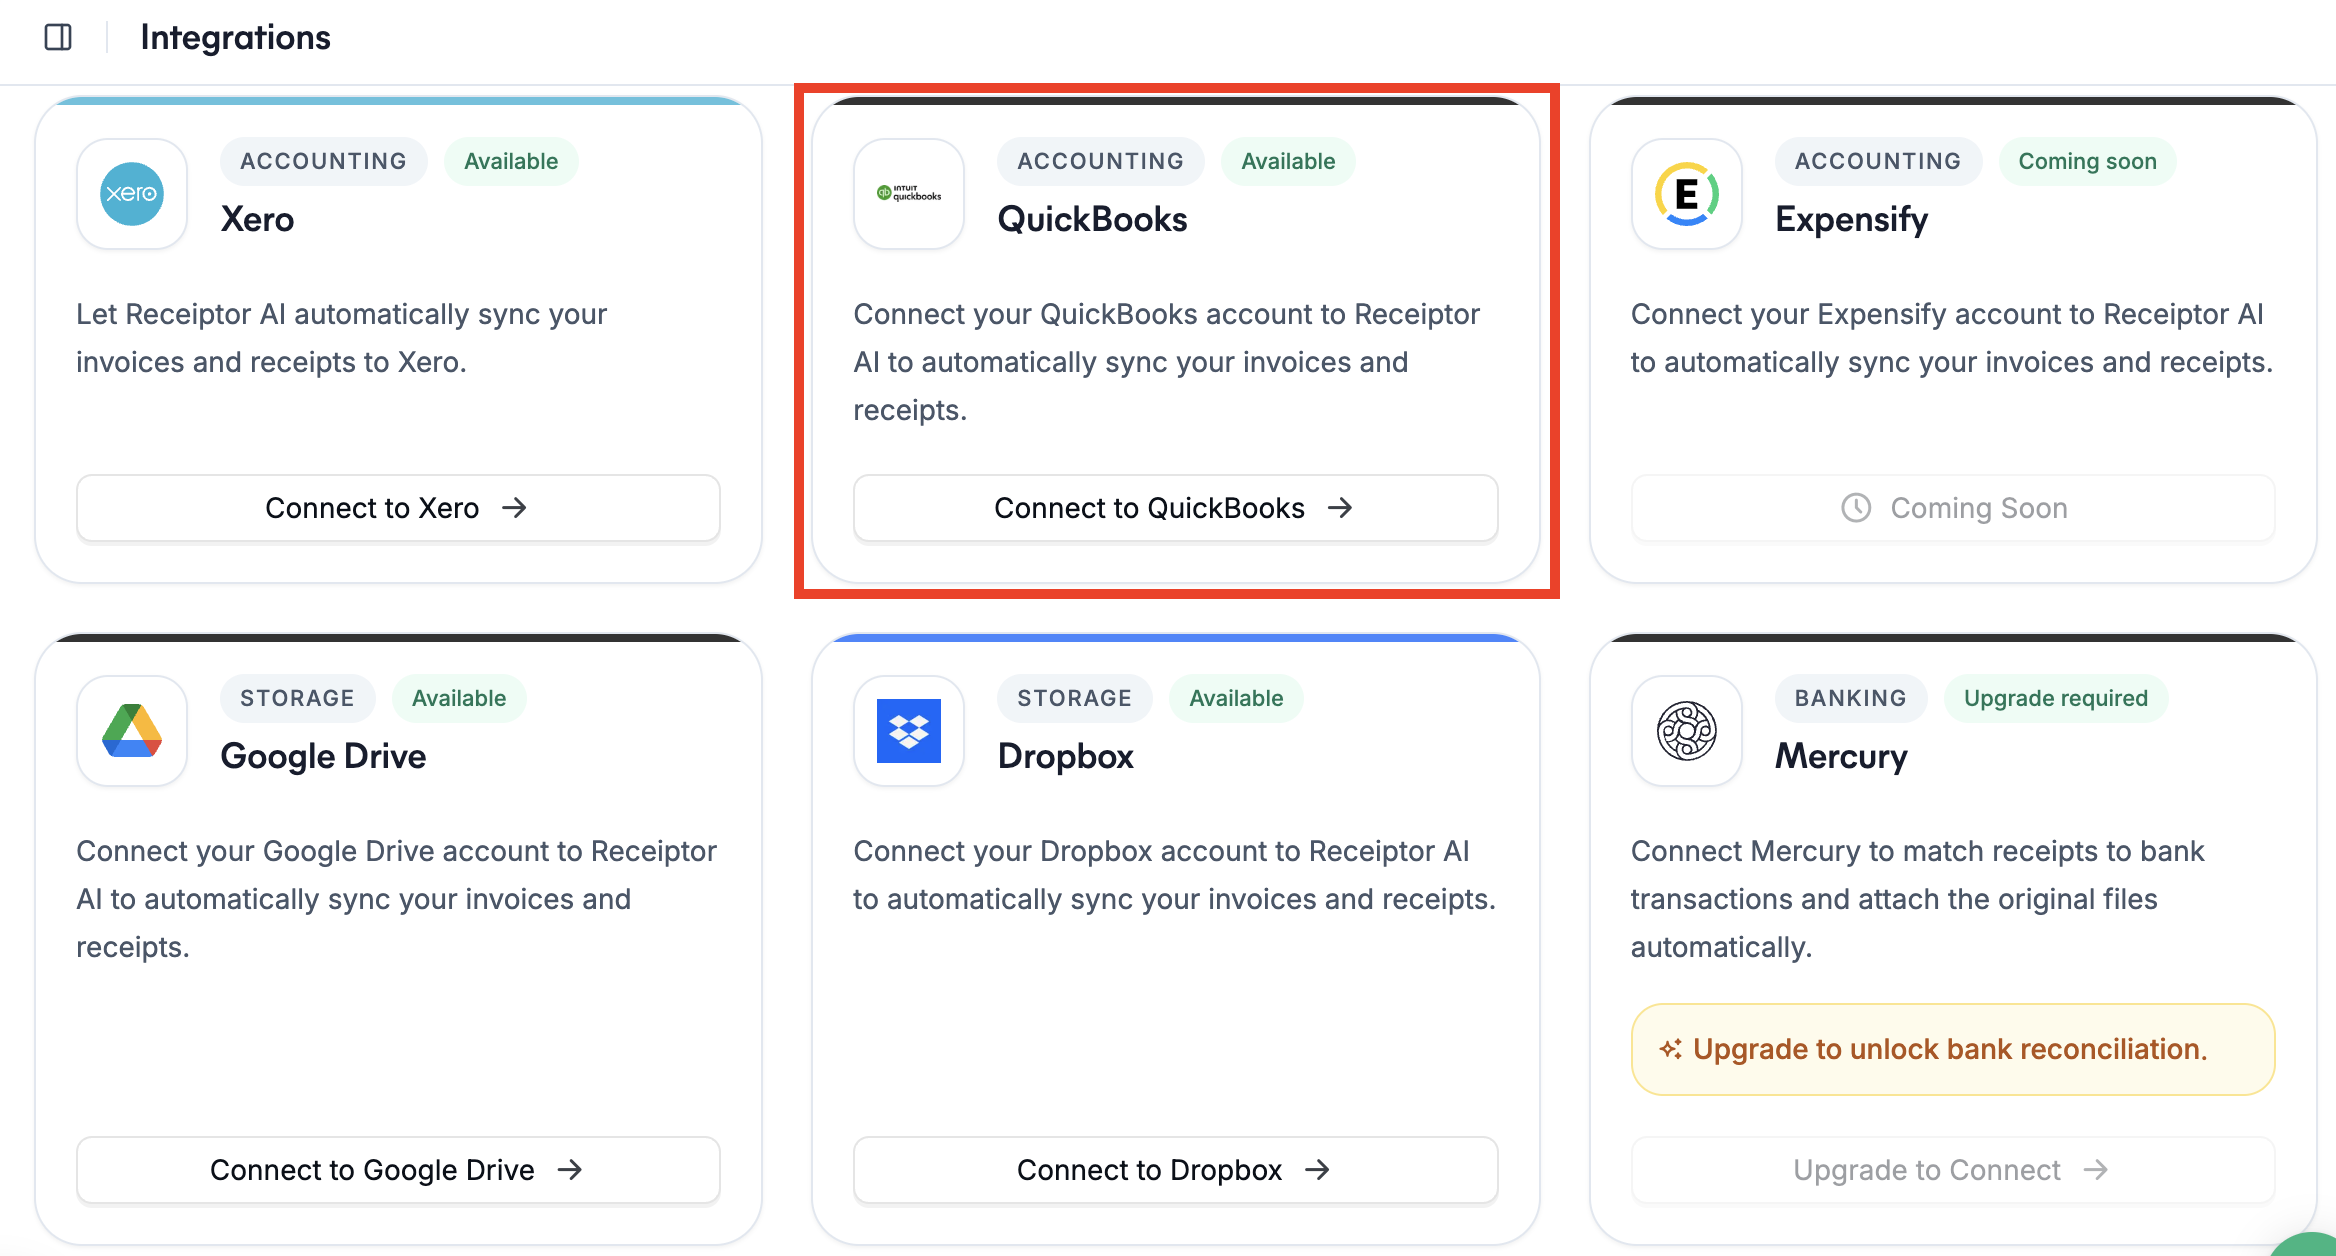
Go to Integrations in your left sidebar.
Click Connect to QuickBooks.
You'll be redirected to QuickBooks to log in and authorize the connection.
Once authorized, you'll be returned to Receiptor AI with a confirmation. Your QuickBooks connection is now active.
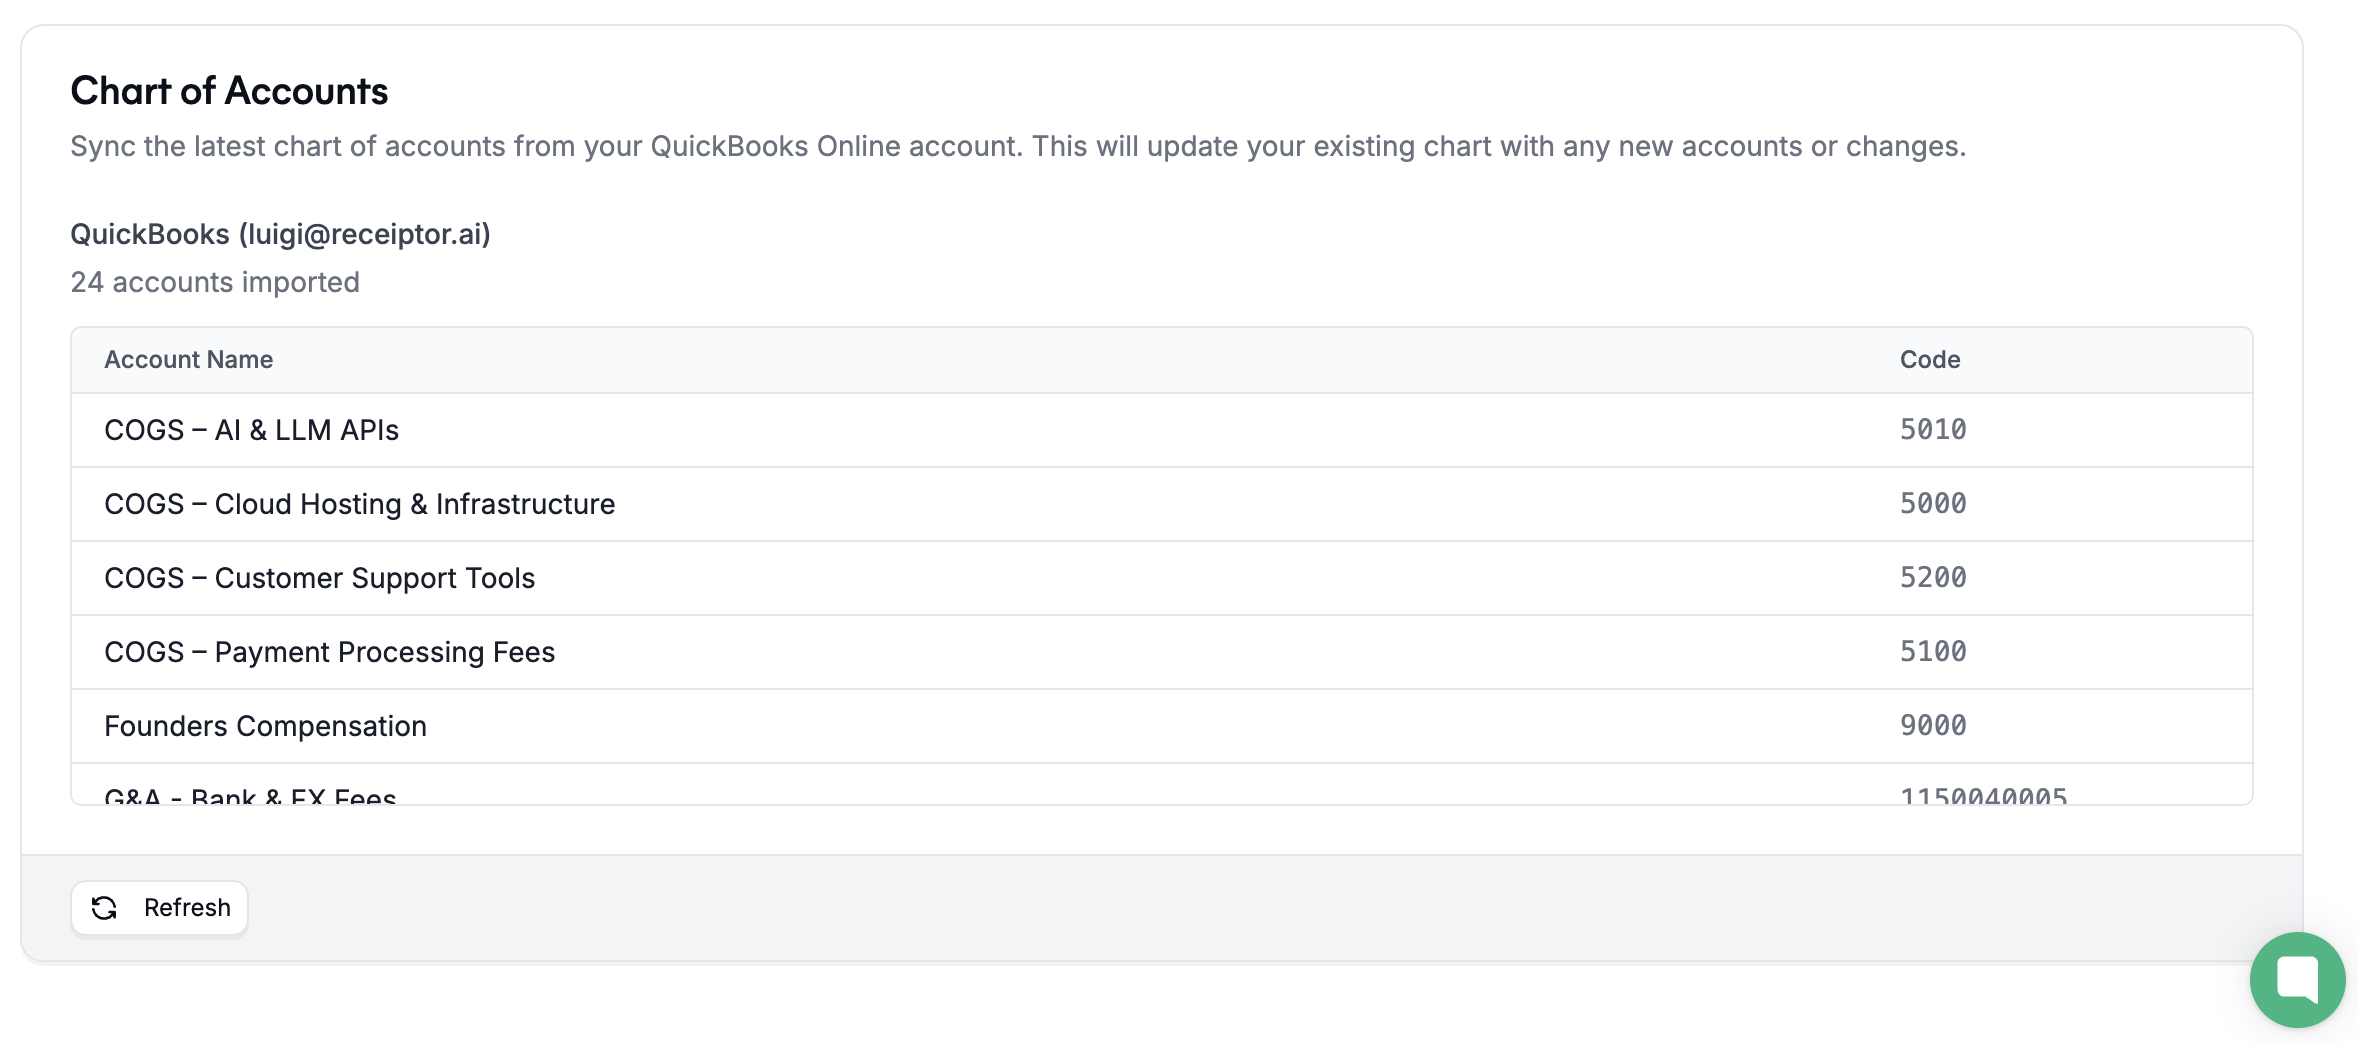
When you connect to QuickBooks, your Chart of Accounts is automatically imported into Receiptor AI.
Go to Settings > Chart of Accounts.
Find the imported QuickBooks chart and click Set as Default (the star icon on the left).
Once set as default, every new document will be auto-categorized against your QuickBooks accounts using AI, so your exports are already categorized when they arrive in QBO.
You have two ways to export: manually or automatically.
Use this when you want to review documents before sending them to QuickBooks.
Go to the Documents section.
Select the documents you want to export (use the checkboxes to bulk select).
Click Export.
Select your QuickBooks account as the destination.

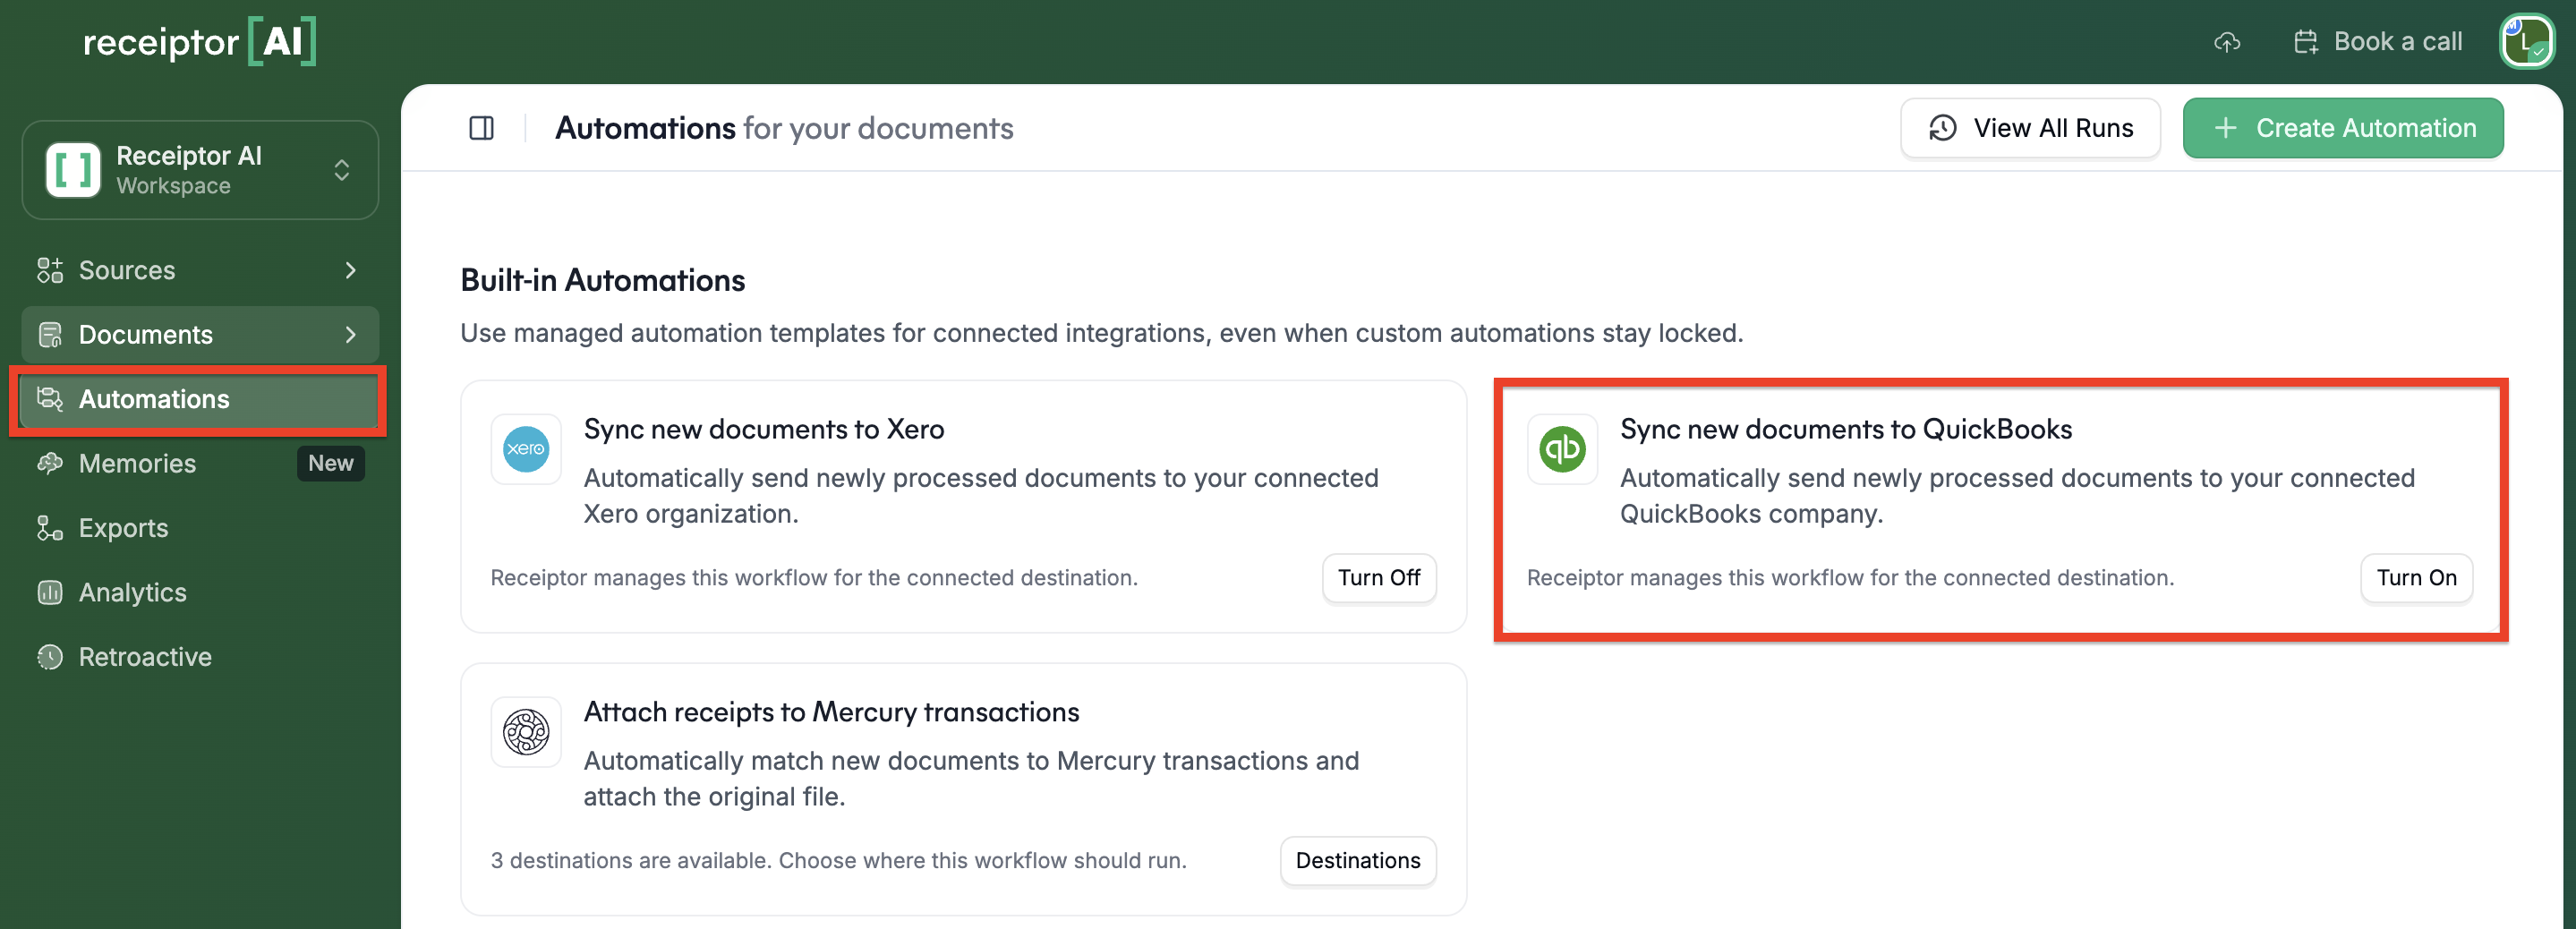
Use this to push every new document to QuickBooks as soon as it is extracted, with no manual steps.
Go to Automations.
Find the Sync new documents to QuickBooks automation.
Click Turn on.
From this point, every document Receiptor AI extracts will be automatically sent to QuickBooks.
You can also build a custom automation rule with conditions (e.g., only export documents where payment status is Unpaid, or only from a specific merchant). See How to set up automation rules for details.
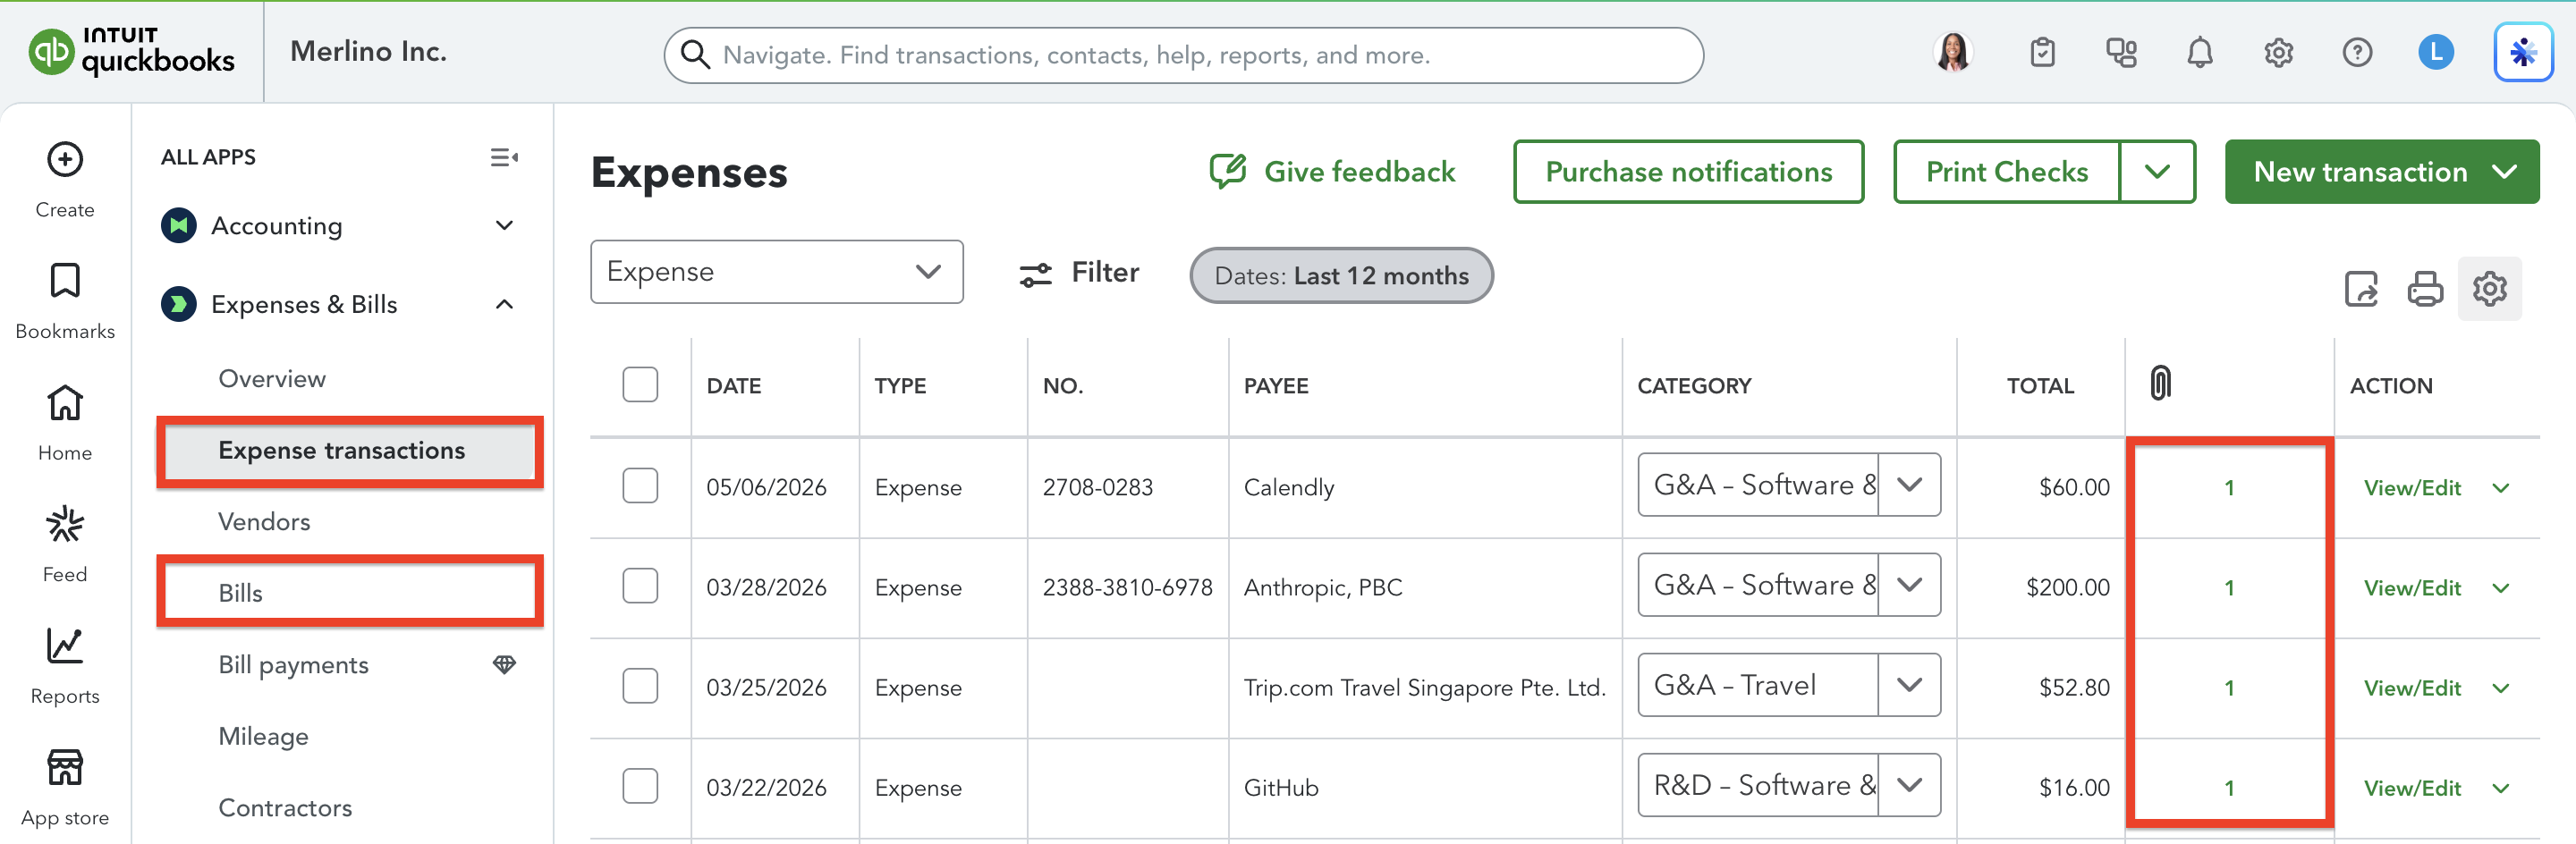
The type of document determines what gets created in QuickBooks:
Receipt creates an Expense transaction with all extracted data (merchant, amount, date, payment method, category) and the original document attached as a file.
Invoice creates a Bill transaction with all extracted data (merchant, amount, date, due date, category) and the original document attached as a file.
In both cases, if a matching transaction already exists in QuickBooks, Receiptor AI will only attach the document to it. It will not recreate the transaction or overwrite any existing data.
There are three ways to track export status, depending on how much detail you need.
In the Documents list, each row shows a small set of icons on the left side. The export icon appears on any document that has been exported at least once. Hover over it to see a quick summary of where the document was sent.

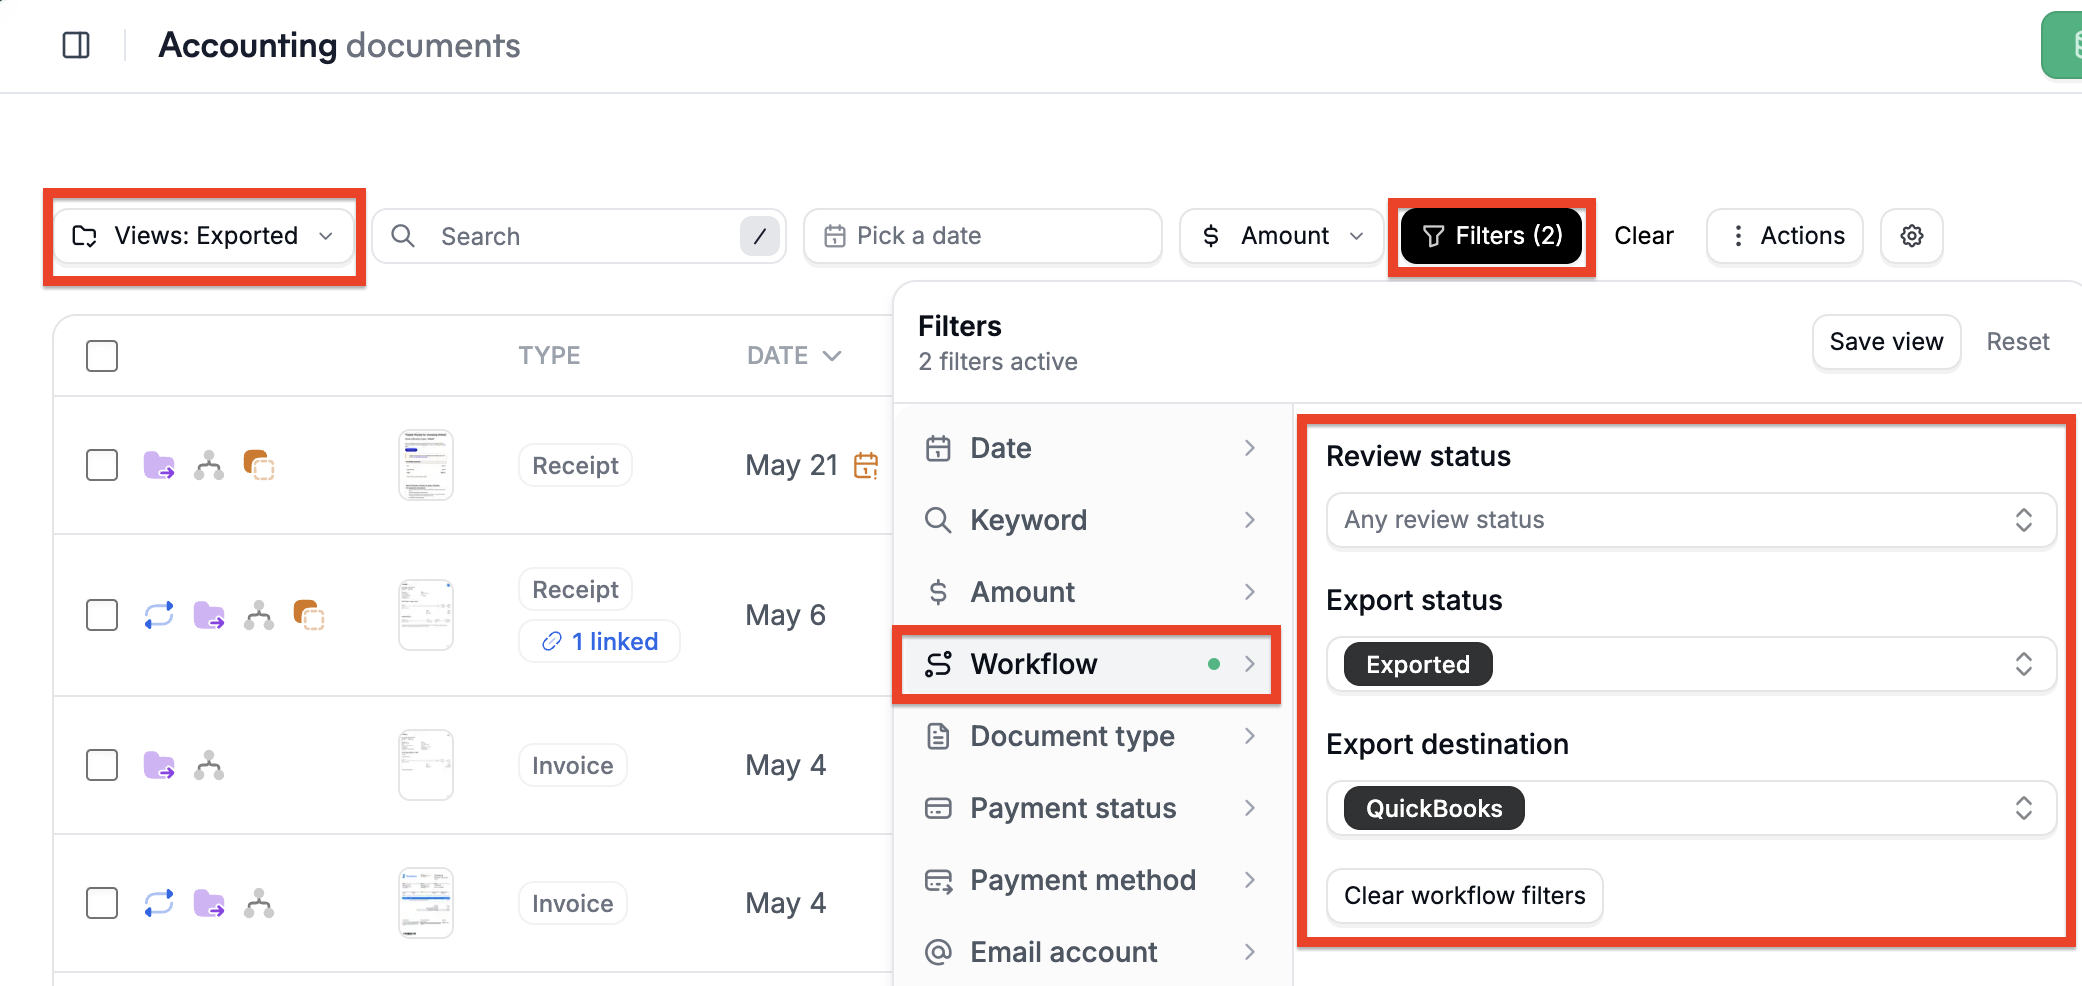
At the top of the Documents section, you'll find pre-built tab filters:
To Export: documents that have never been exported to any destination.
Exported: documents that have been exported at least once.
You can also build this as a saved filter: open Filters > Workflow, and set Export Status and Export Destination, then save the view so you can reload it anytime.
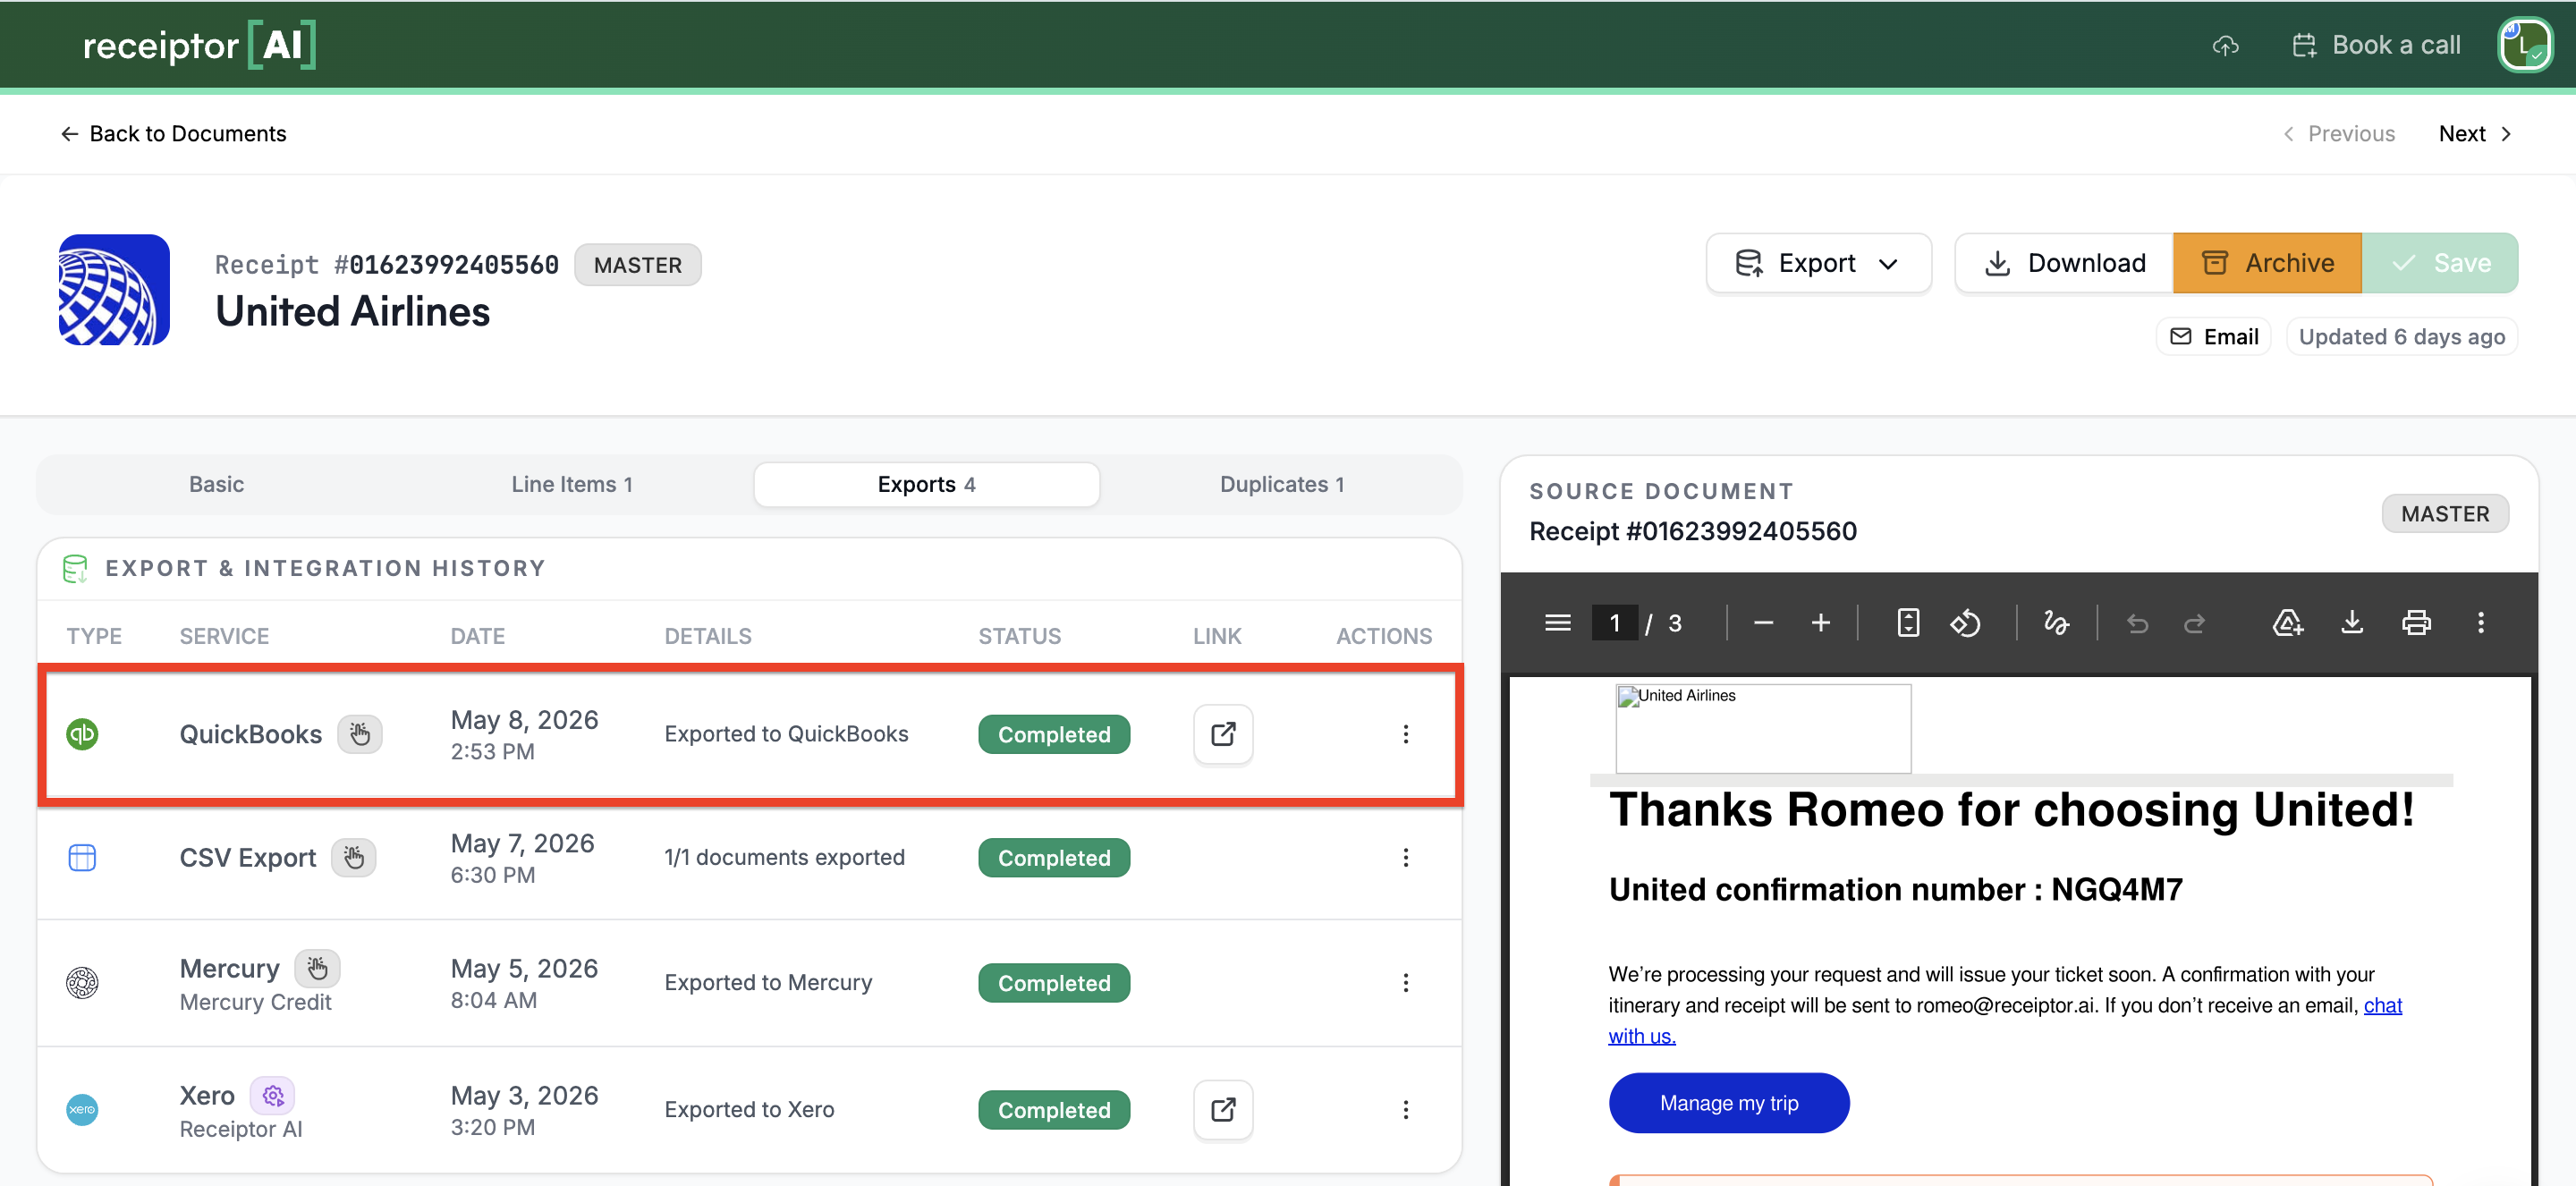
Open any document by clicking on the vendor name. On top, you'll see the ‘Export’ tab showing every time that document has been exported, the destination, the date, and a direct link to the corresponding transaction in QuickBooks.
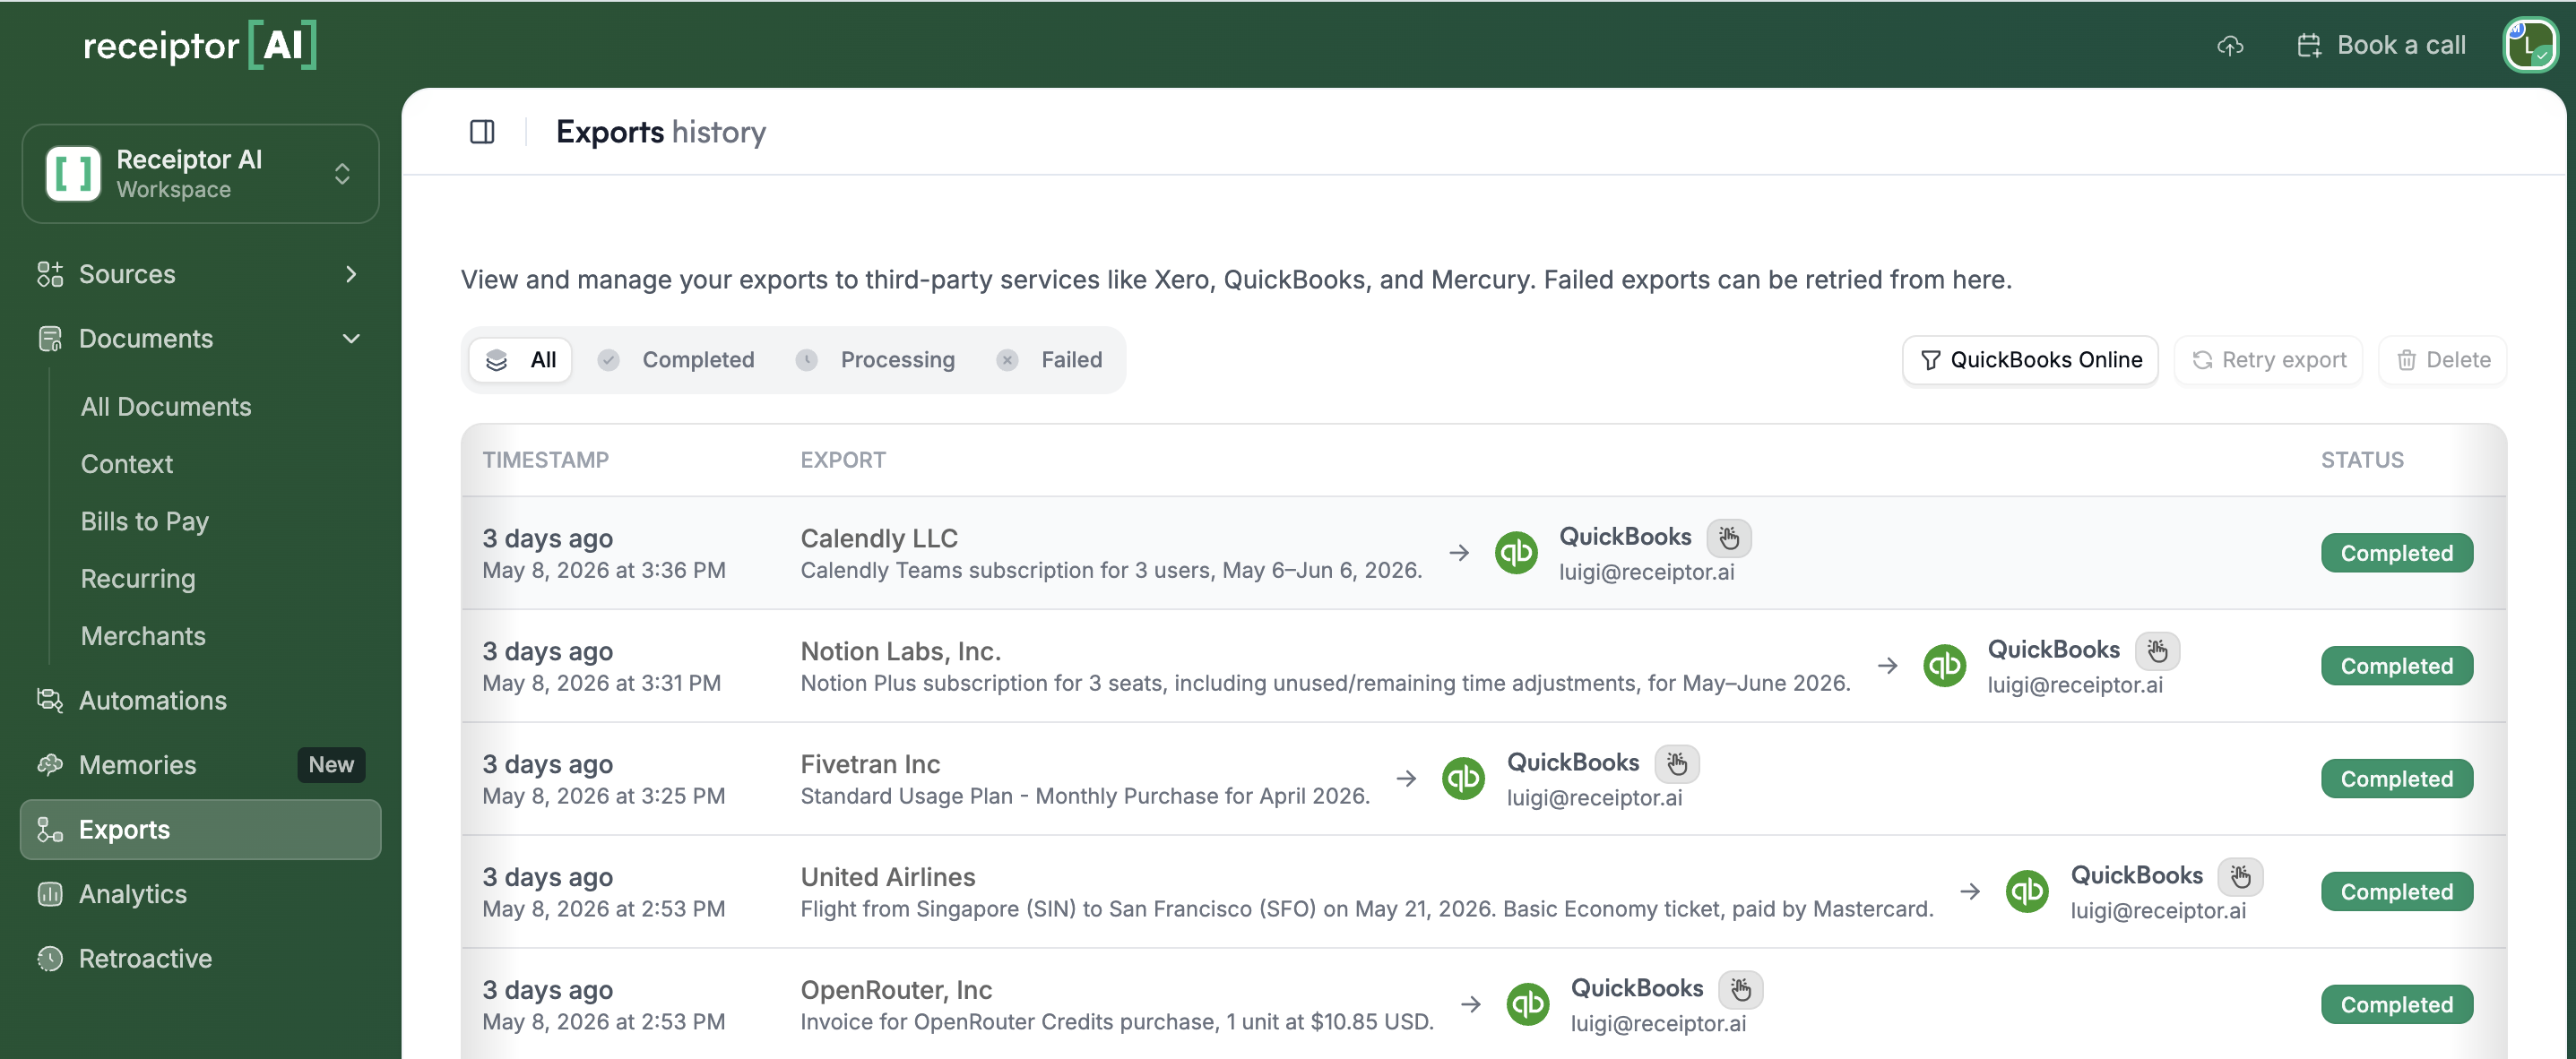
Go to Exports in the left sidebar to see every export job across all documents and all destinations. You can filter by status (completed, failed, processing) and by destination (QuickBooks, Xero, CSV, etc.).
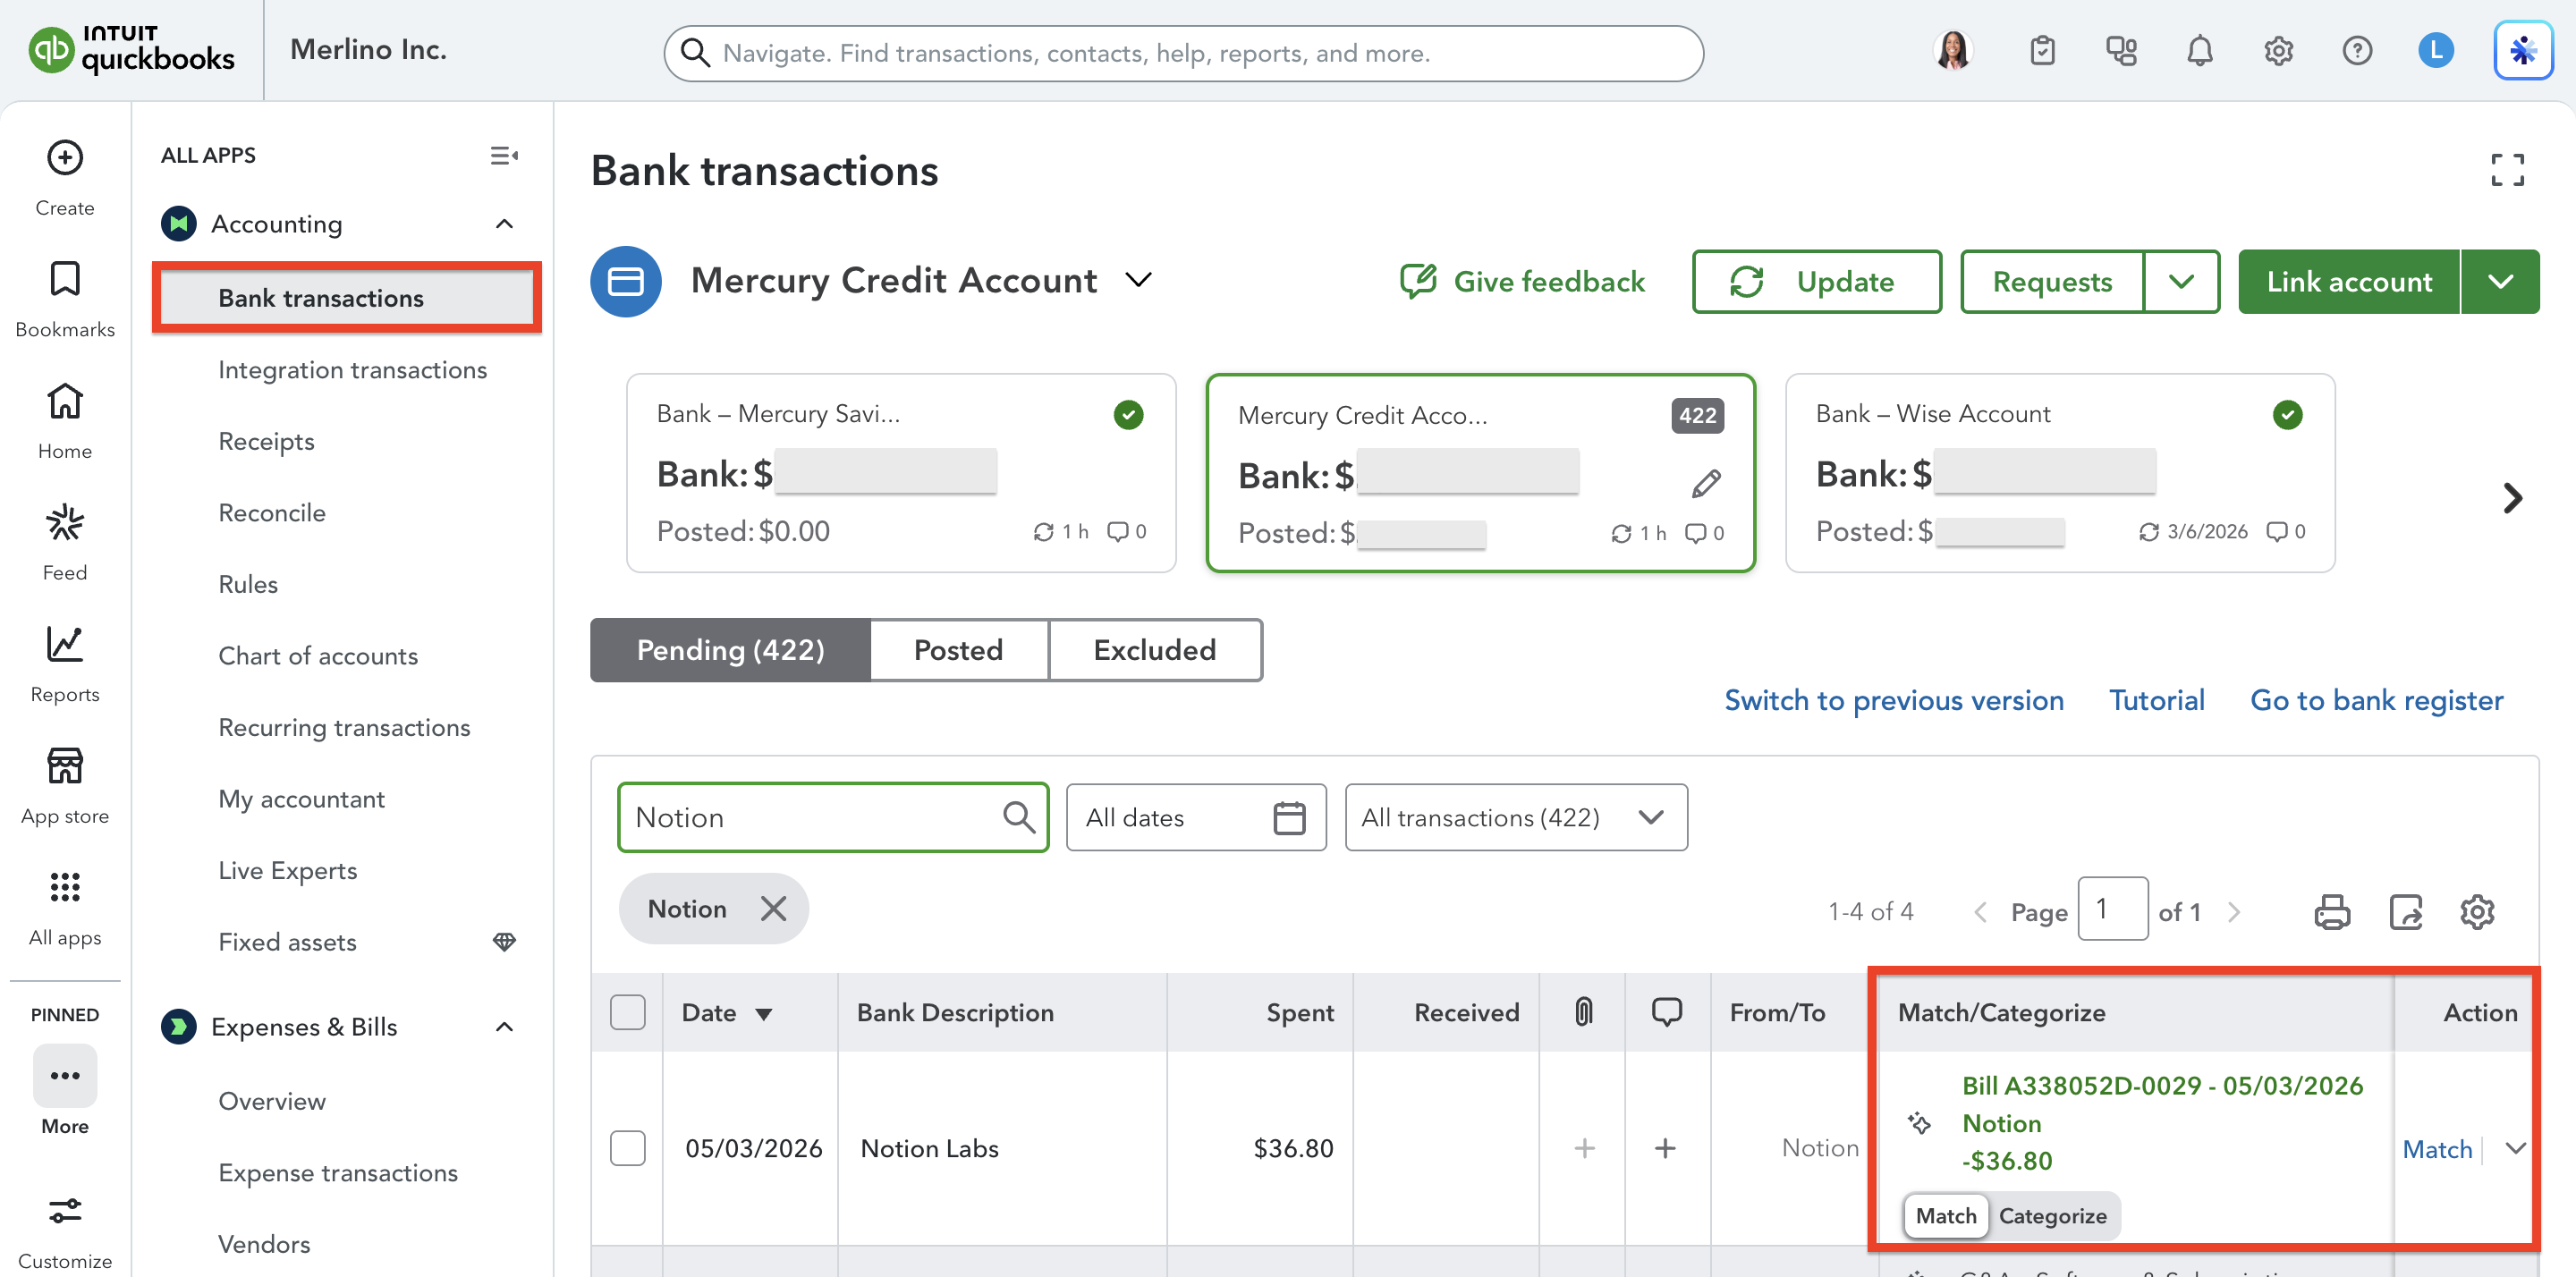
Once your Expenses and Bills are in QuickBooks, you can use QBO's built-in matching to reconcile them against your bank transactions.
If you have a connected bank account or imported bank statements in QuickBooks:
Open the Accounting > Bank Transactions section in QuickBooks.
QuickBooks will suggest matches between bank transactions and the Expenses/Bills Receiptor AI created.
Confirm the matches. The bank transaction will be linked to the expense or bill (which already has your original document attached) and posted to your register.
This gives you a complete audit trail: bank transactions, accounting entries, and source documents, all linked in one place.
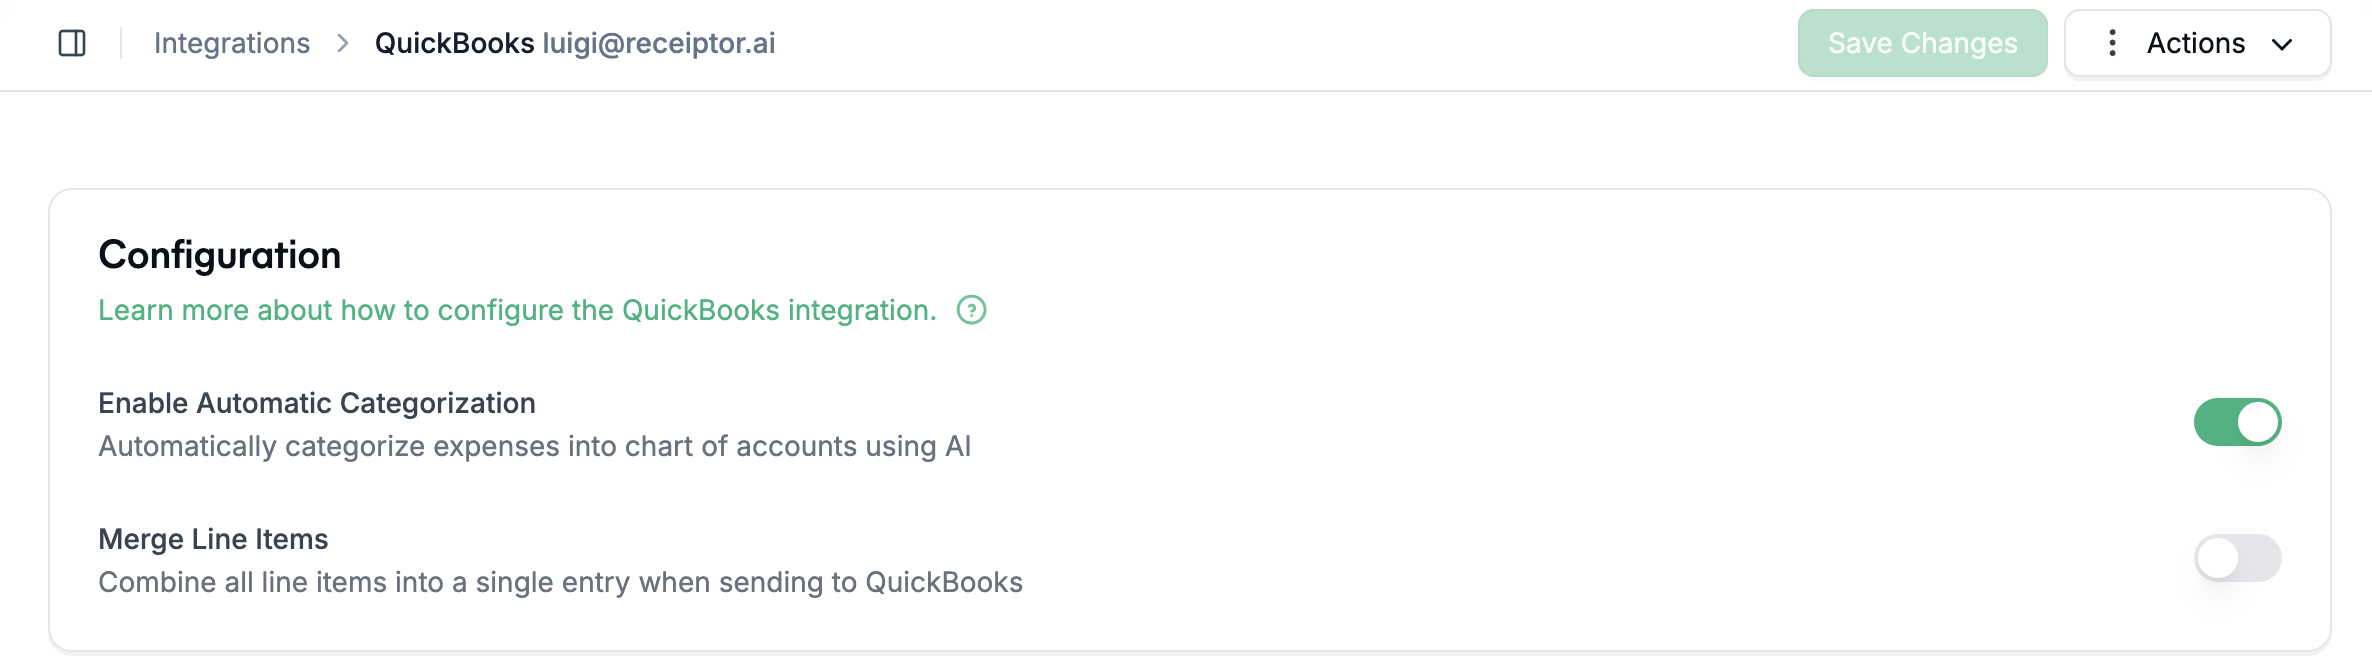
You can customize the QuickBooks integration under Integrations > Settings.
Enable Auto-categorization (enabled by default): Receiptor AI automatically assigns the correct account from your Chart of Accounts to each document before it is sent to QuickBooks. Disable this toggle if you prefer to categorize manually.
Merge Line Items (disabled by default): When enabled, all line items on a document are combined into a single entry in QuickBooks instead of being sent as individual line items.
Q: Can I connect more than one QuickBooks account?
A: Yes. You can connect multiple QuickBooks organizations. When exporting manually, you choose which account to send to. For automatic exports, your automation rule specifies the destination account.
Q: What if a bill/expense already exists in QuickBooks?
A: Receiptor AI detects the existing transaction and only attaches the document to it. Nothing is duplicated, overwritten, or modified.
Q: Will the original receipt or invoice be visible in QuickBooks?
A: Yes. The original PDF is attached to the Expense or Bill in QuickBooks, so you can access it directly from the transaction.
Q: Can I auto-export only certain document types or merchants?
A: Yes. Create a custom automation rule with conditions (e.g., document type, merchant name, categorization) and set the action to Send to QuickBooks. This gives you full control over what gets exported.
Q: My document was exported, but I don't see it in QuickBooks. What should I check?
A: Go to Exports in Receiptor AI and check the status of the export. If it shows as failed, copy the Job ID and contact support via live chat or at [email protected]. If it was successful, you can open the document in Receiptor AI, go to the ‘Export’ tab, and you’ll see the URL in QuickBooks where you can find your document.
Talk to us via the live chat in the bottom-right corner of your dashboard, or email [email protected].
