→ See more about How to Connect Your Mailbox
Before setting up your Continuous Monitoring, make sure you're subscribed to one of our plans (or on a free trial), each of which includes a different number of inboxes you can add.
When monitoring is enabled, Receiptor AI scans incoming emails in real-time for Gmail and Outlook accounts, and every hour for IMAP accounts. Each email is checked against your settings: document types, sender rules, and mailbox scope. Relevant documents are automatically extracted and added to your Documents section.
You stay in full control: you can pause monitoring at any time, restrict it to specific senders or document types, and fine-tune exactly what gets scanned.
Go to Collect → Emails. Each connected inbox has a toggle on the left. Switch it on to start monitoring, or off to pause it at any time.
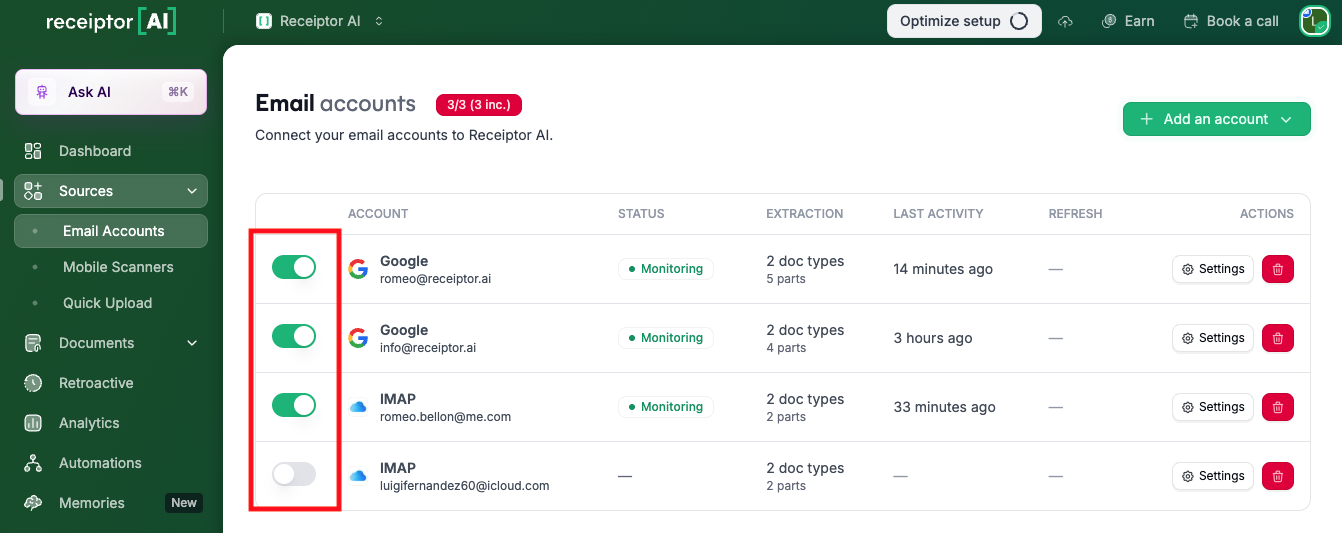
The Status column confirms whether monitoring is active. Last Activity shows the last time an email was processed.
Each inbox has its own settings. Click the Settings button on the right of any connected account to open its configuration panel.
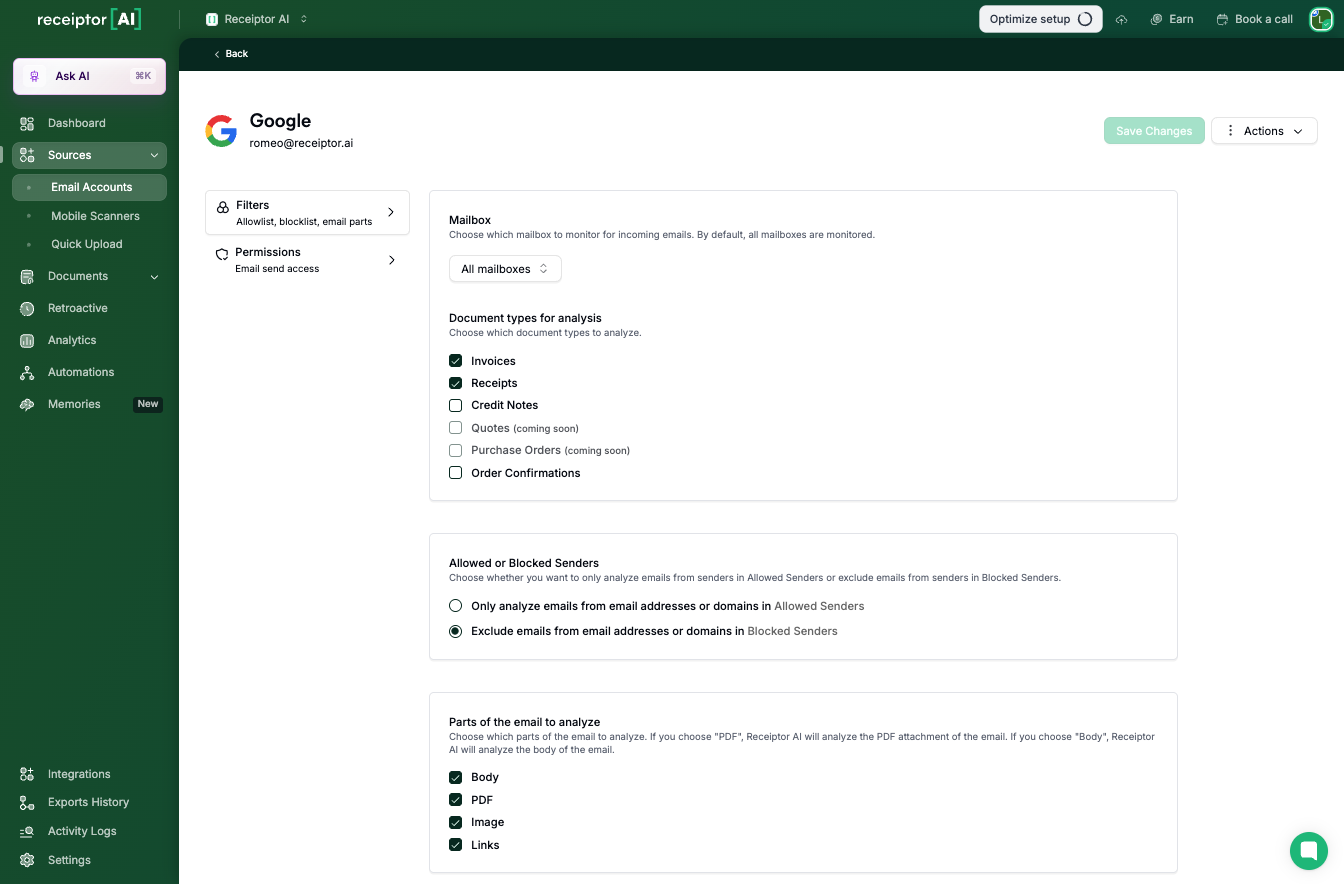
By default, Receiptor AI scans all mailboxes (inbox, folders, labels). If you want to limit scanning to a specific folder, for example, a dedicated "Expenses" label in Gmail, select it here.
Choose which document types to extract:
Invoices
Receipts
Credit Notes
Order Confirmations
Receipts and invoices are enabled by default.
You can restrict which senders get scanned in two ways:
Only analyze emails from allowed senders: Receiptor AI will only process emails from addresses or domains you've explicitly approved.
Exclude emails from blocked senders: Receiptor AI will process all emails except those from addresses or domains you've blocked.
You manage your Allowed and Blocked sender lists in Settings → Email Management.
Choose which parts of incoming emails Receiptor AI should look at:
PDF attachments: the most common source of invoices and receipts
Image attachments: photos of receipts, scanned documents
Email body: useful for e-receipts sent as HTML emails (Amazon, Uber, Airbnb, etc.)
Enable all three for maximum coverage, or restrict to specific formats for tighter control.
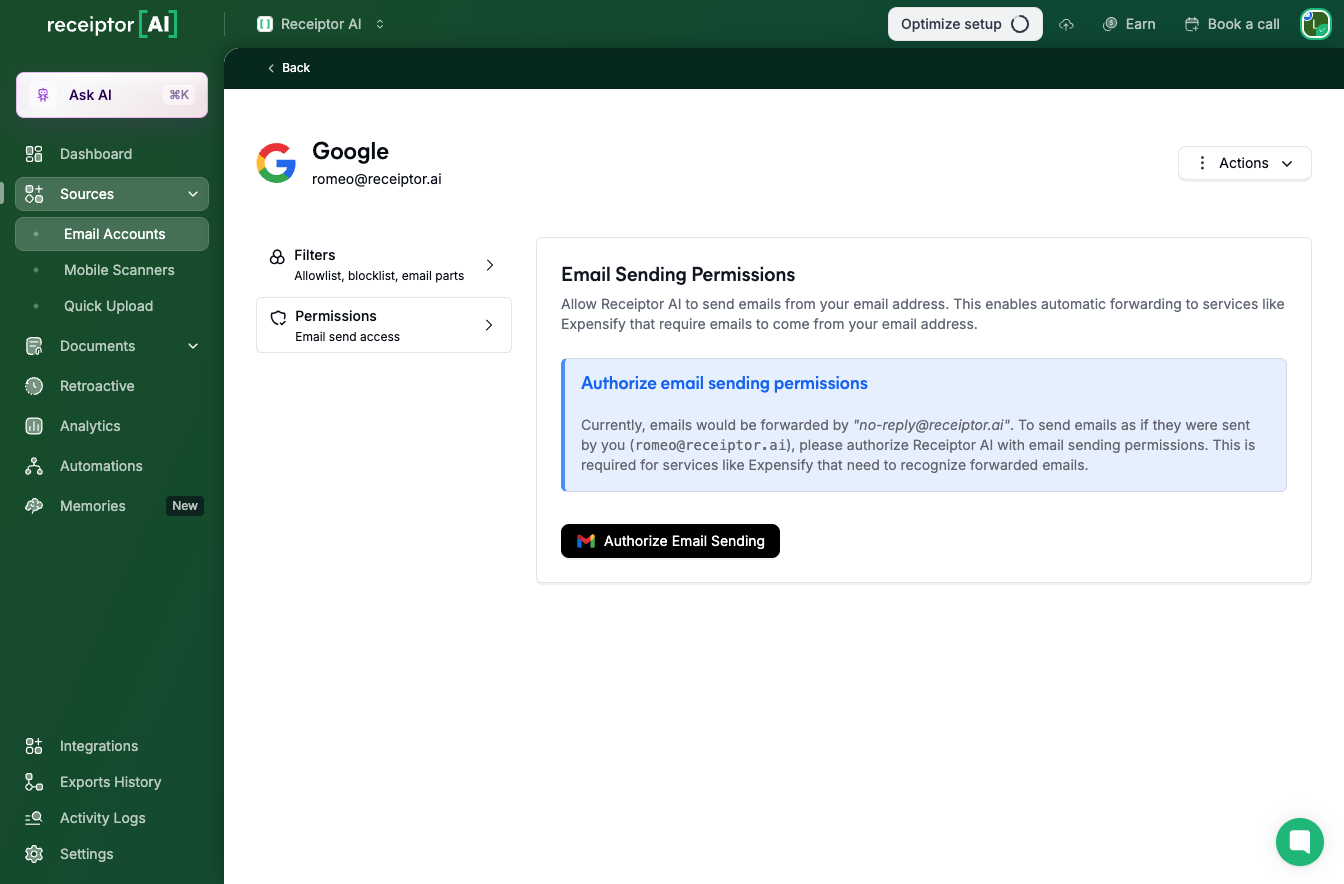
If you plan to forward documents from Receiptor AI, either manually or via automation, you need to first authorize sending permissions for that inbox. → See more about the forwarding feature.
Go to Permissions inside the inbox settings panel and click Authorize email sending.
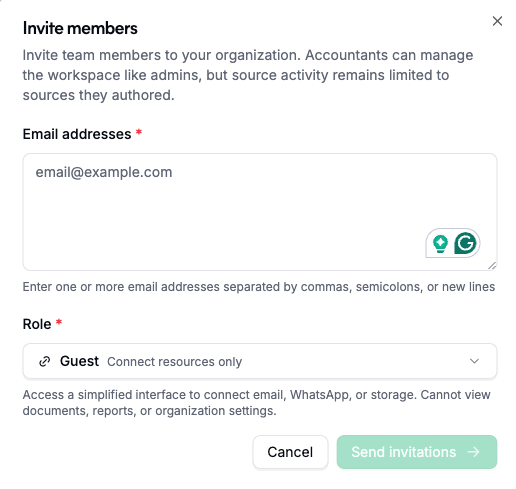
If you want a team member or client to connect their own email account (you don't have access to), you can invite them to the Workspace.
Click Invite a guest from the Email Account page and enter their email address. They'll receive an invitation to connect their inbox.
Guests can only see and manage their own connected sources. They have no access to documents, other members' data, or any workspace settings. If you want to give them access, you can choose the Member role.
Q: How can I check if an email was scanned or a document extracted?
A: Check your Activity Logs (left sidebar) to see exactly what happened to that email: whether it was scanned, skipped, or flagged.
Q: Does Receiptor AI read all my emails?
A: No. Receiptor AI processes your inbox in layers. First, it filters out anything that doesn't match your configured settings: sender rules, mailbox scope, and document types. Then, it skips emails it can determine won't contain a financial document, like spam or newsletters. Only emails that pass both layers are analyzed.
Q: Can I monitor multiple inboxes?
A: Yes. You can connect as many email accounts as you need. Gmail, Outlook, and IMAP accounts can all run simultaneously within the same workspace. Each has its own independent settings and monitoring toggle.
Q: Can I stop monitoring temporarily without disconnecting my account?
A: Yes. Use the toggle in the Emails section to pause and resume at any time. Your settings and history are preserved.
Still have questions? Reach out via the in-app chat or at [email protected].
