You’ve finally decided to implement an AI agent to automate your receipt and invoice workflow: collection, processing, management, and export. Here’s what you need to do right after you sign up:
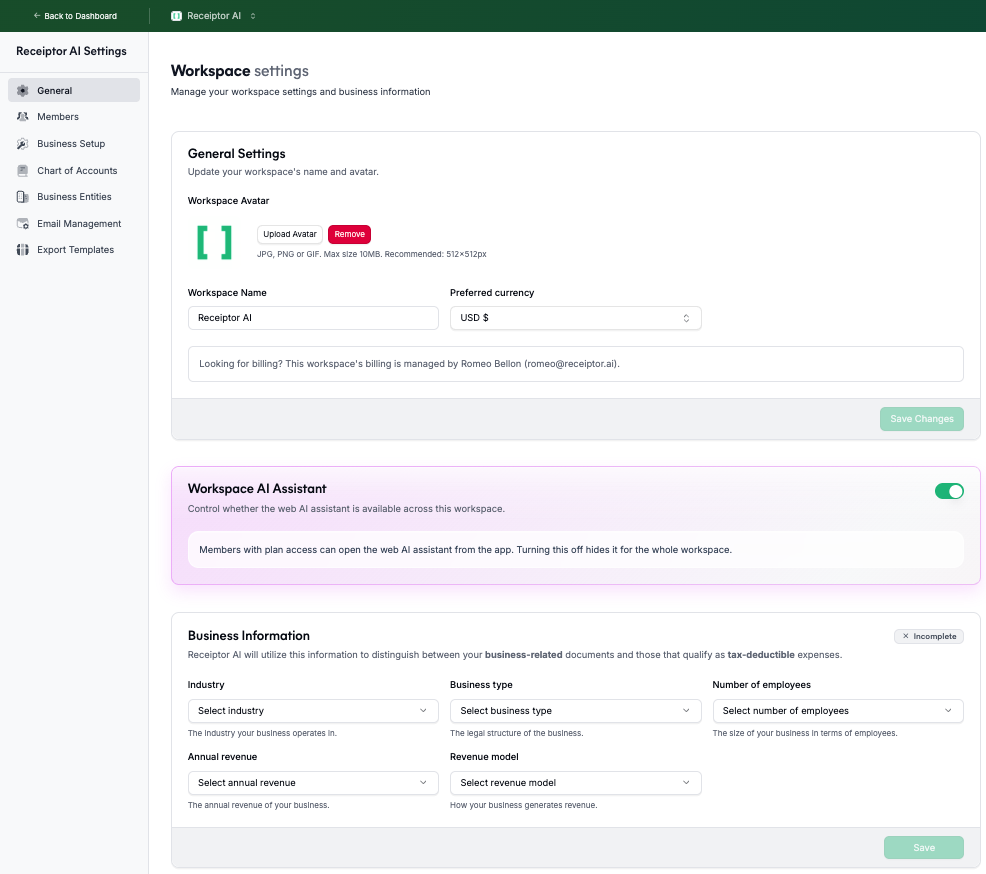
During the signup flow, you’ll be asked to name your Workspace and choose its preferred currency. Each workspace is an isolated environment where you can connect different sources, keep your documents separate, and set different settings. We recommend filling at least:
General & Business Setup
Chart of Accounts → See more.
Business Entities (if you need them) → See more.
You can create multiple of them to manage different clients or businesses, but we recommend setting one first.
If you want to know more about Workspaces and how to set them up, see this article.
Navigate to Sources → Email Accounts.
Click Add Email Account and authenticate with Google, Microsoft, or IMAP. See more.
Enable and configure Continuous Monitoring. See more.
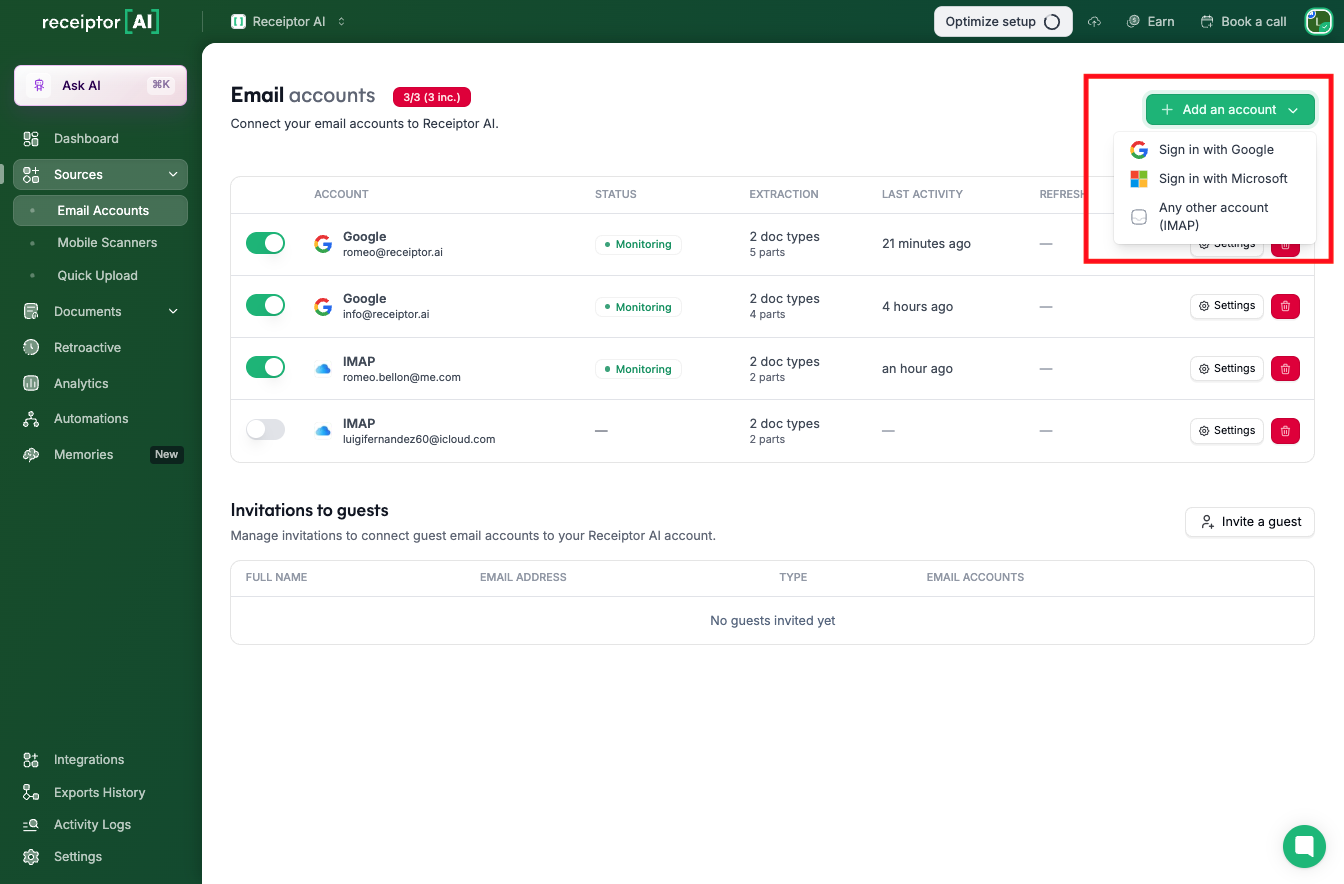
Receiptor AI continuously scans new emails to extract all relevant documents and place them in your Documents section.
If you need to catch up on past documents, or if you’d like to test the performance of Receiptor AI directly, you can run a Retroactive Extraction, which will scan your past emails and extract all relevant documents.
In the Retroactive section, select an inbox and a date range.
Open ‘Advanced Options’ to select your search preferences (specific mailbox, document types, formats, sender filters). See more.
Request a quote, review the volume and cost, and proceed. If you want to try for free, we always offer a 1-month free retroactive extraction in your first Workspace.

Receiptor AI processes past emails and brings historic receipts into your Documents section.
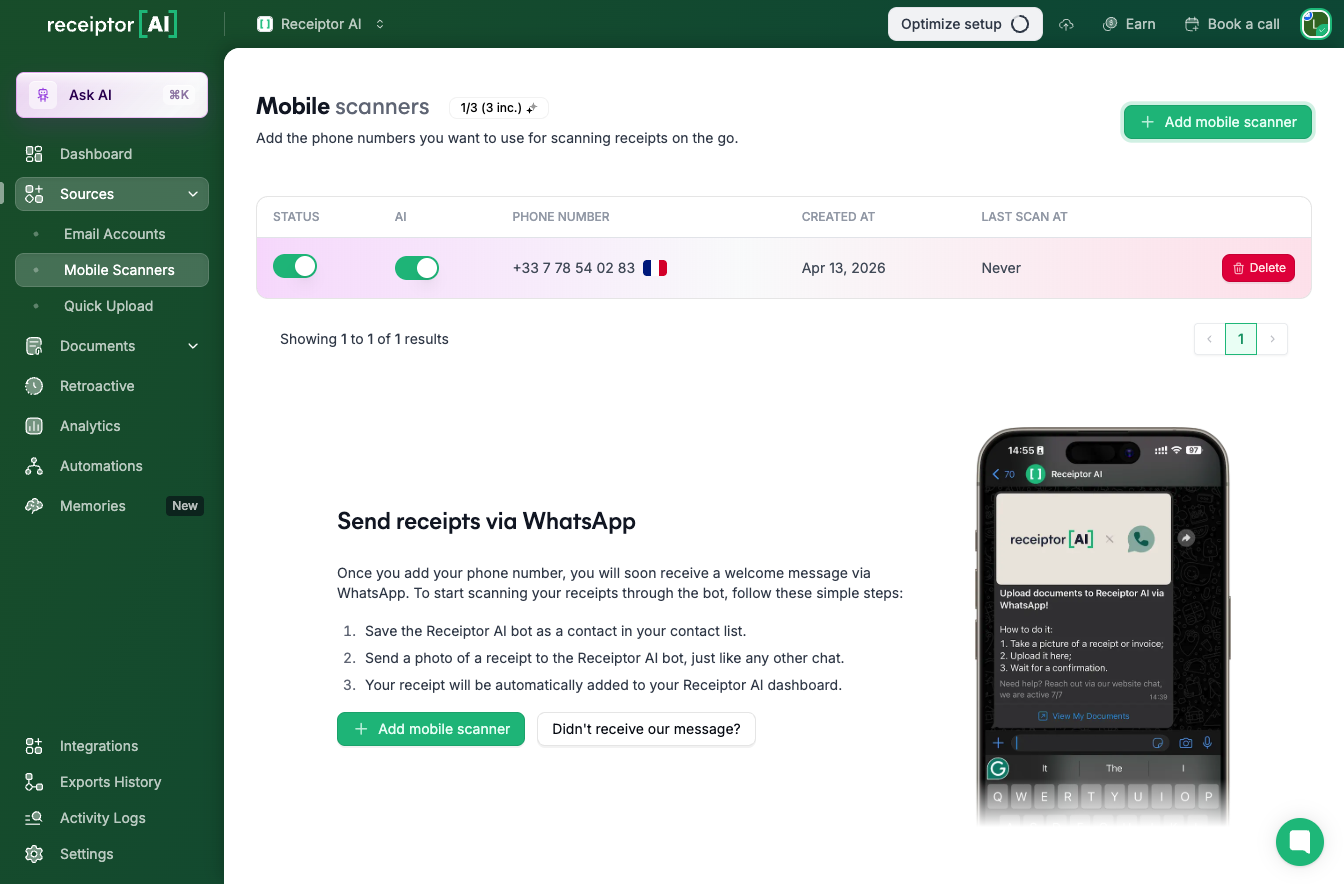
If you need to snap paper receipts or physical documents, you can add mobile scanners. It will give you access to a ‘Receiptor AI’ contact on WhatsApp, where you can send photos or documents.
Go to Sources → Mobile Scanners.
Enter a mobile number; Receiptor AI will send a WhatsApp message.
From WhatsApp, send photos of receipts. The AI imports them and asks for retakes if unclear. See more.
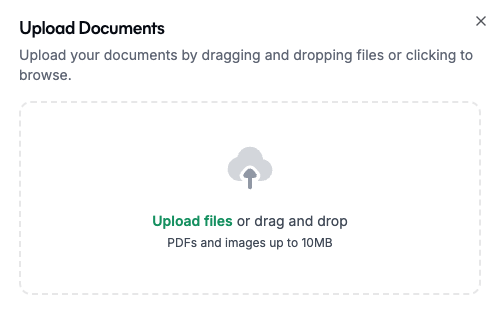
If you need to add additional documents, you can use the Quick Upload function to drag-and-drop PDF or image files (up to 10 MB each). The AI automatically extracts data from the uploaded documents.
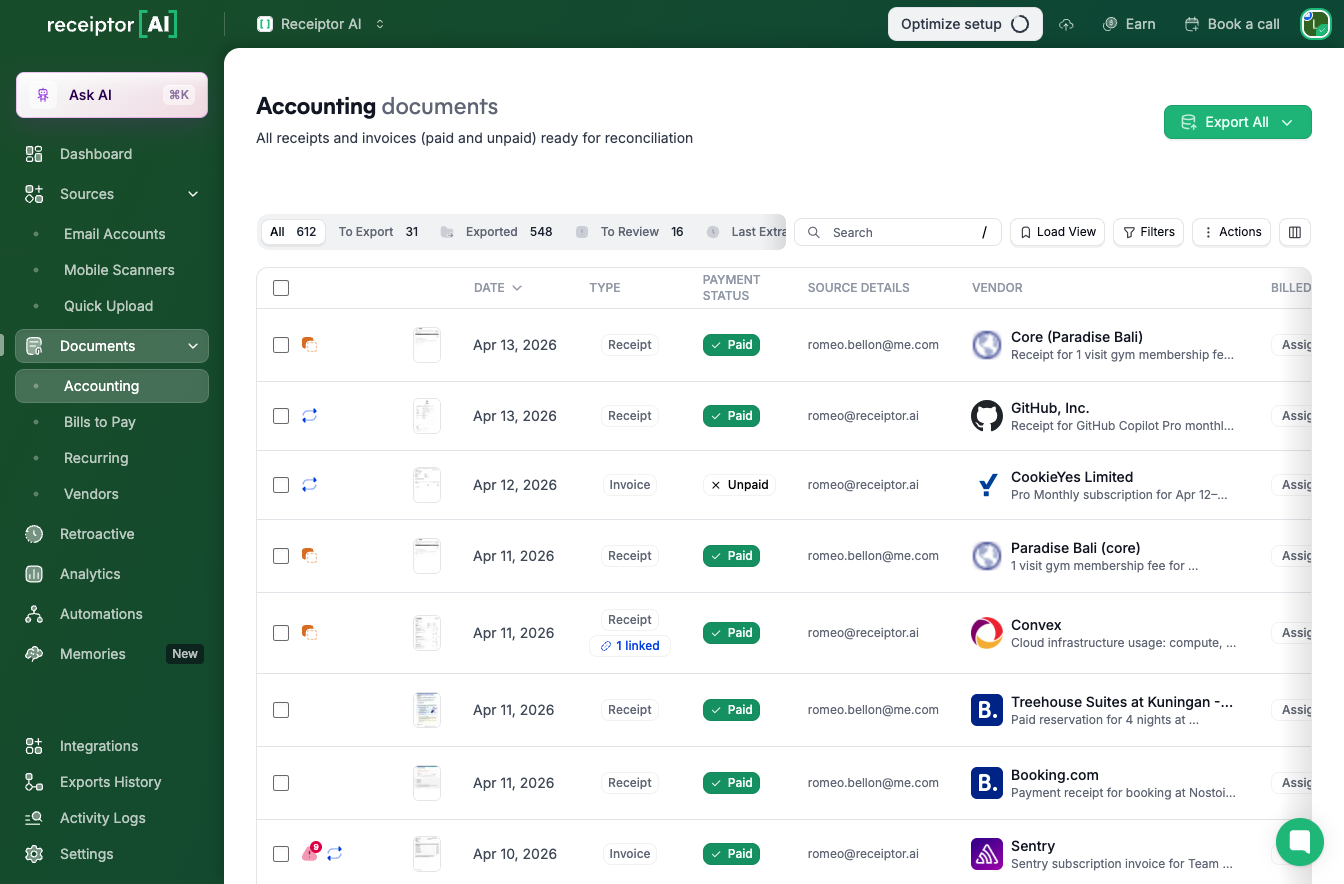
Go to the Documents section.
Use filters or the search bar to find specific documents.
Click a vendor name to open document details and see the PDF preview. See more about using the documents section.
Select one or more documents.
Click Export All and choose your format:
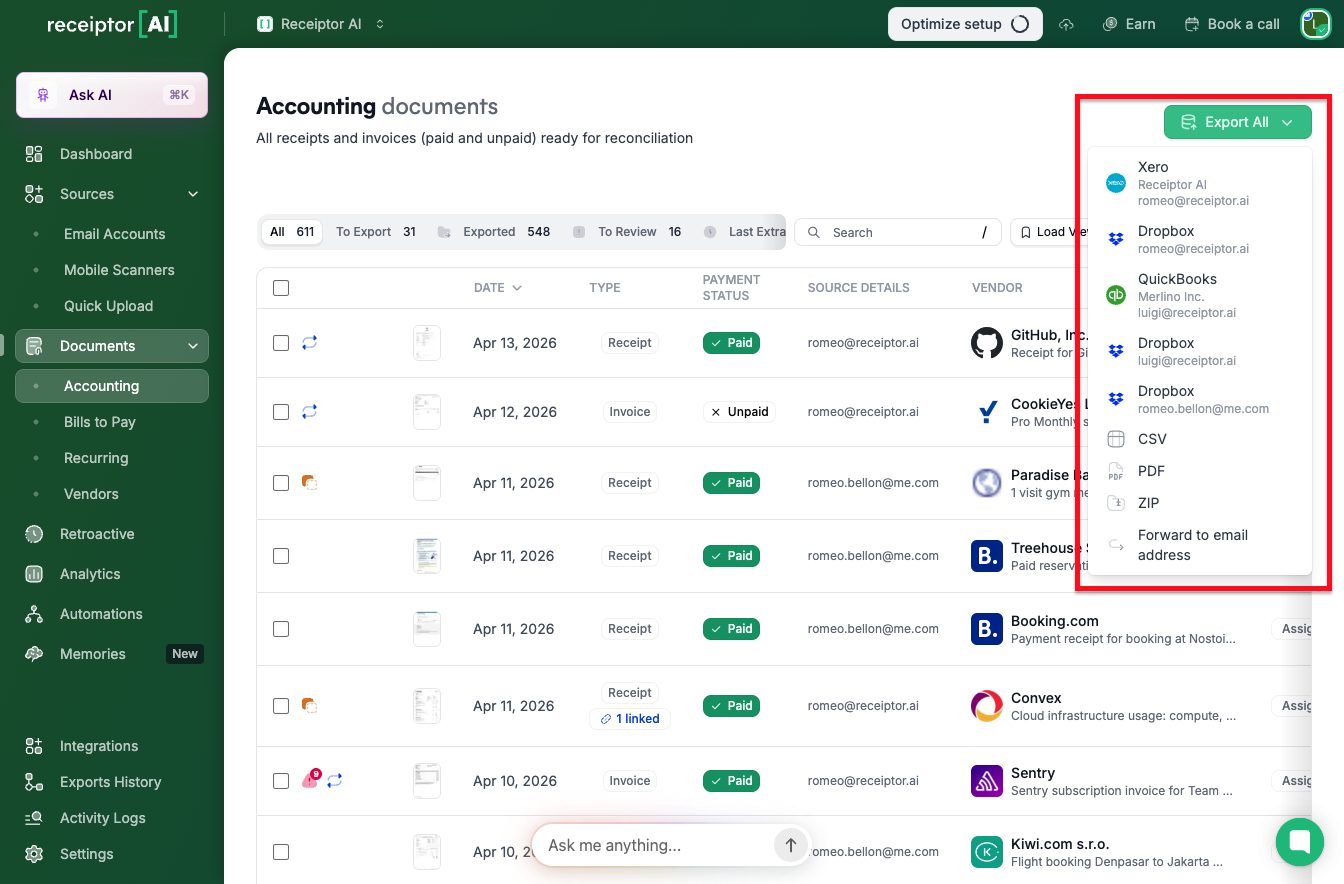
You receive your data and files in the selected destination. All exports can be tracked in your Exports History section.
Under Workspace Settings → Members, click Invite Member.
Enter the user’s email, and choose their role (Admin, Member, Accountant, Guest). See more.
Send the invitation.
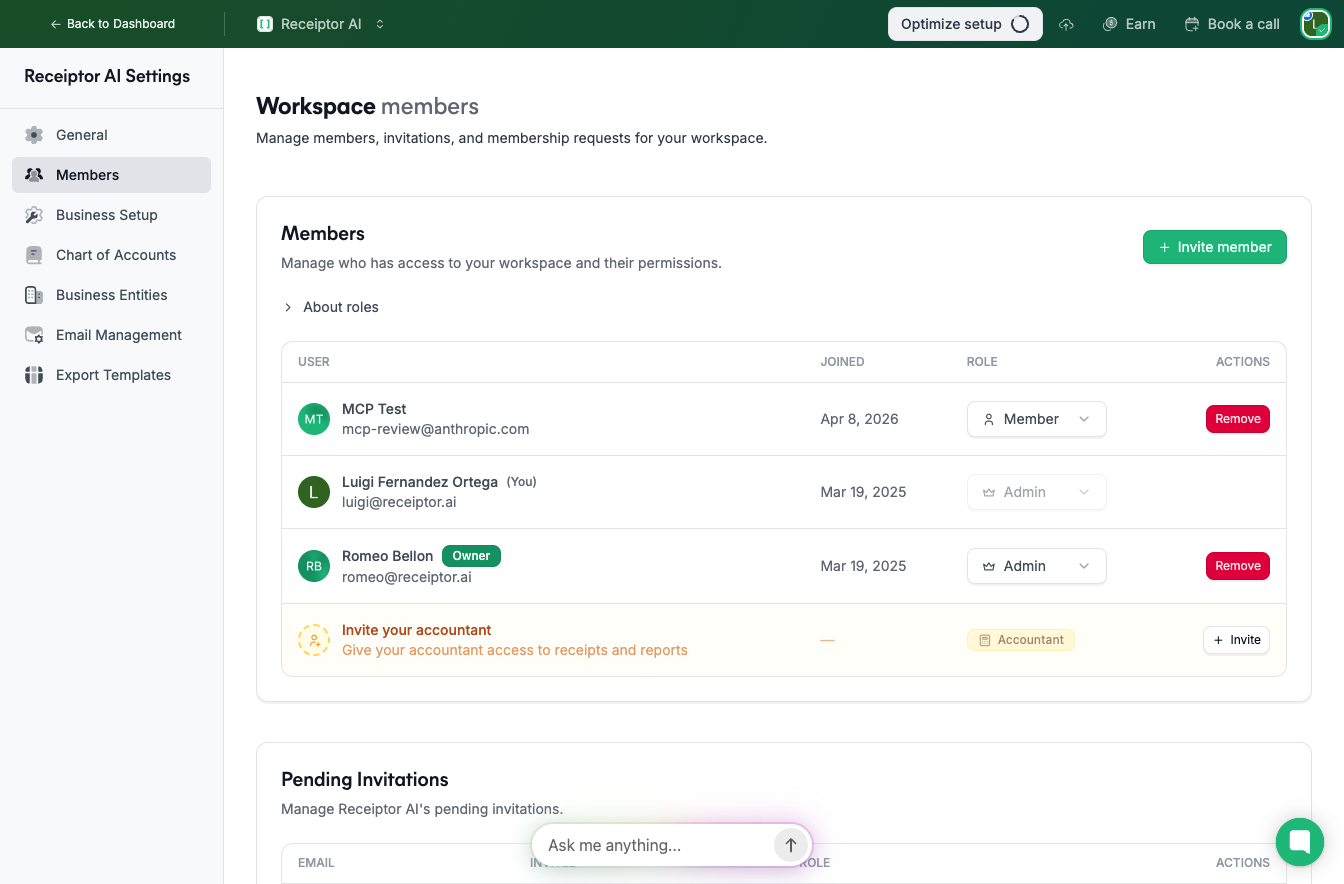
Invited members receive an email to join your workspace with their assigned permissions.
You’re now set up with Receiptor AI. To go further in using this AI to automate your receipt workflow, we recommend exploring:
How to create custom Automations to manage your documents
How to handle AI Agent Memories
How to integrate Receiptor AI with your existing workflow
Q: What file types and sizes can I upload or email to Receiptor AI?
A: Supported formats include PDFs and images (JPEG, PNG) up to 10 MB each. If your documents are larger or in another format, you should export them to PDF or an image and then upload.
Q: Can I connect multiple email accounts or workspaces during setup?
A: Yes. You can add multiple email inboxes under Sources → Email Accounts, and you can create additional workspaces for different clients or business entities.
Q: How does retroactive extraction pricing work?
A: Retroactive scans are priced based on the volume of emails and the date range you select. You’ll see a quote before running the extraction.
Q: How do I set up or import my chart of accounts quickly?
A: Go to Workspace Settings → Chart of Accounts. You can create it manually, import from CSV, let the AI generate one, or import from Xero/QuickBooks.
Q: What if Receiptor AI misreads or miscategorizes a document?
A: Open the document in the Documents section, edit the incorrect fields, and save. These corrections train the AI for future accuracy.
Q: How can I invite my accountant or team members during setup?
A: From Workspace Settings → Members, click Invite Member, enter their email, choose a role (Admin, Member, Accountant, or Guest), and send the invitation.
If you run into issues while getting started, please contact us at info@receiptor.ai or via the in‑app chat.
